
Brightness
Lightens or darkens the mid-tones while black and white stay where they are. No grey veil, no washed-out shadows.
Group: Color & Tone · How to add an effect
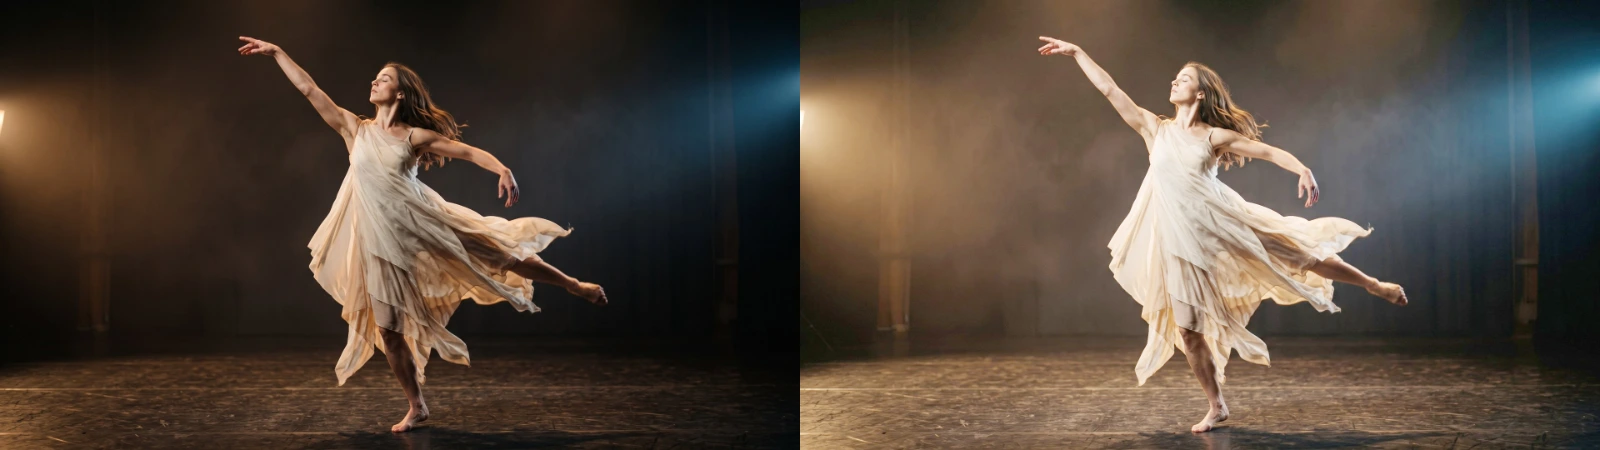
Use it for: footage that is a little too dark or too bright · lifting a dim projection without greying it · calming a background behind a title.
- Amount – up to lighten, down to darken.
Tip: keyframe Amount from 0 down to −0.8 for a slow fall of night. Unlike a fade to black, the spots and the brightest costume stay alive to the end. For a change of light like the camera’s aperture, use Exposure.
Presets
Section titled “Presets”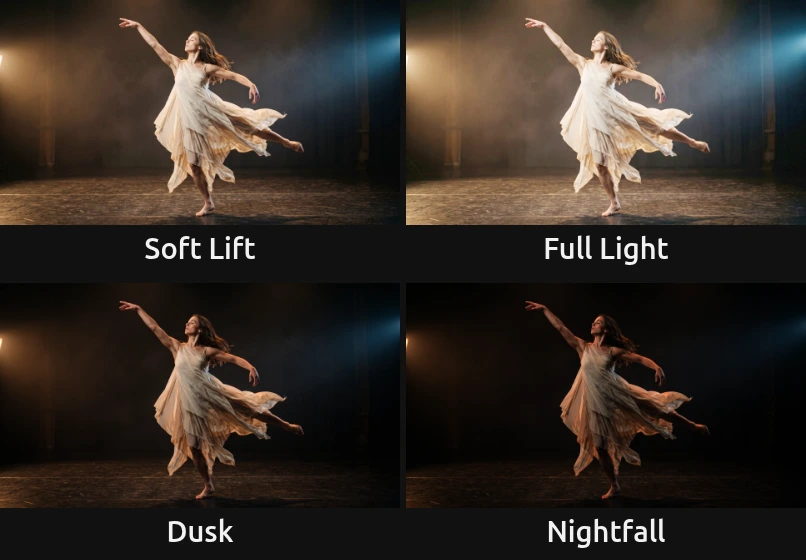
Pick one in the Preset row of the effect card. It sets Amount in one undo step, and the row then shows its name until you change the value. A keyframed Amount keeps its keyframes, and the card says so.
Soft Lift – a gentle lift: a dim projection or a slightly dark shot opens up, and nobody notices that anything was changed.
Full Light – open, airy mid-tones, as under full stage light. The haze and the set come out of the dark, while the brightest whites still hold.
Dusk – calmer, heavier mid-tones: evening light, or a background that steps back behind a title.
Nightfall – only the lights and the brightest surfaces remain. For night scenes and the moment before a blackout.
Controls
Section titled “Controls”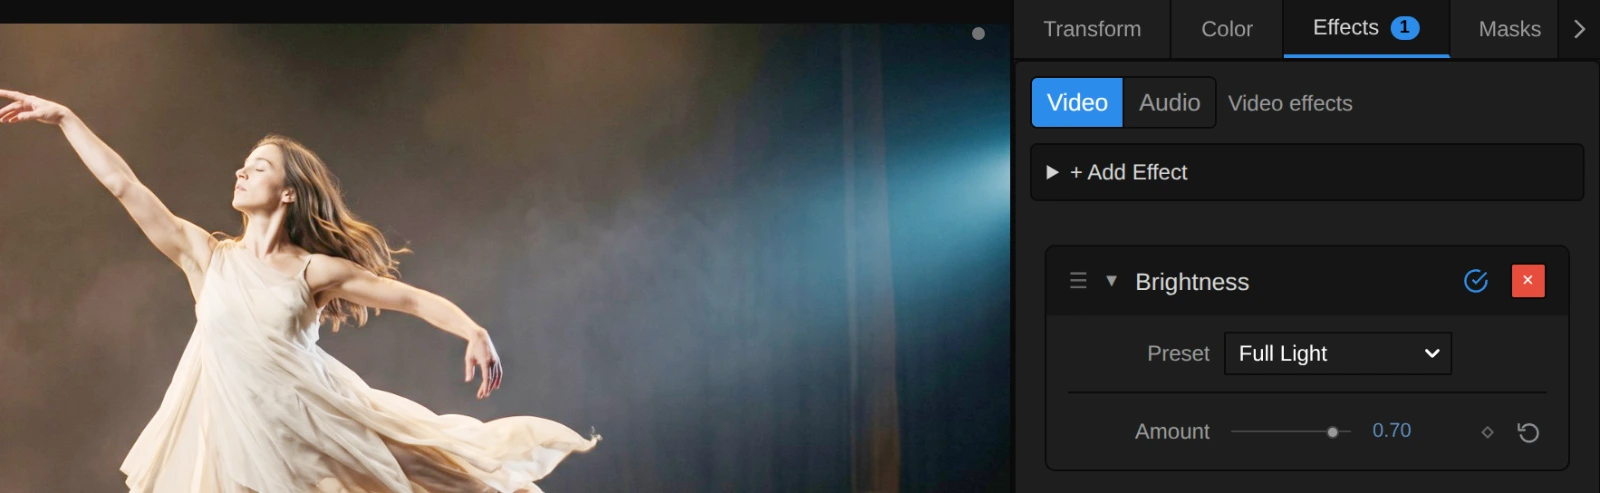
Preset – one of the four starting points above; it sets Amount.
Amount – how much lighter or darker the mid-tones get. Up lightens, down darkens; black stays black and white stays white at every value, so nothing clips and no grey veil appears. 0.2–0.3 is a lift you feel more than see, 0.7 opens a dark stage clearly, 1 is strong. Darkening deepens colours a little, lightening softens them, as on a lighter or darker print. −1 to 1, default 0. In the number field you can type up to ±4, for extreme looks where almost everything turns white or black.
Node setup
Section titled “Node setup”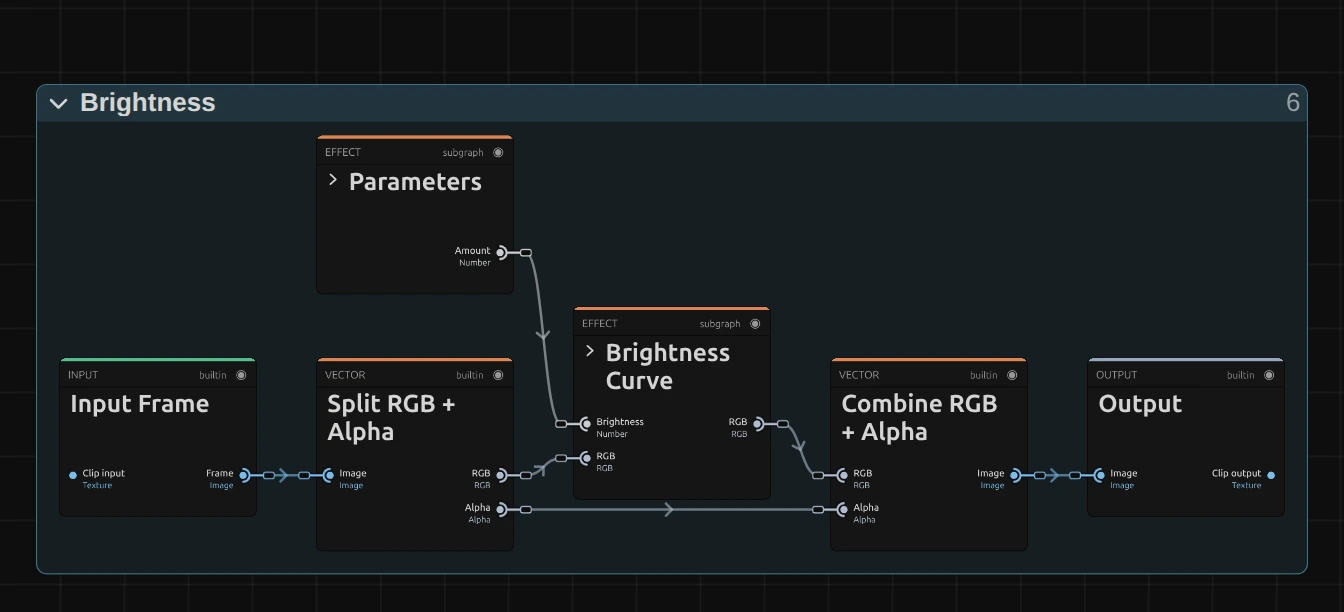
Brightness works in two stages (Color & Tone shows the shape all colour effects share), one folder each in the Nodes tab: Parameters holds Amount and keeps it within the range the curve can show, and Brightness Curve bends each colour channel with it. Split RGB + Alpha takes the transparency aside first and Combine RGB + Alpha puts it back untouched. Click a folder’s header to open it; the sections below show what is inside.
Parameters
Section titled “Parameters”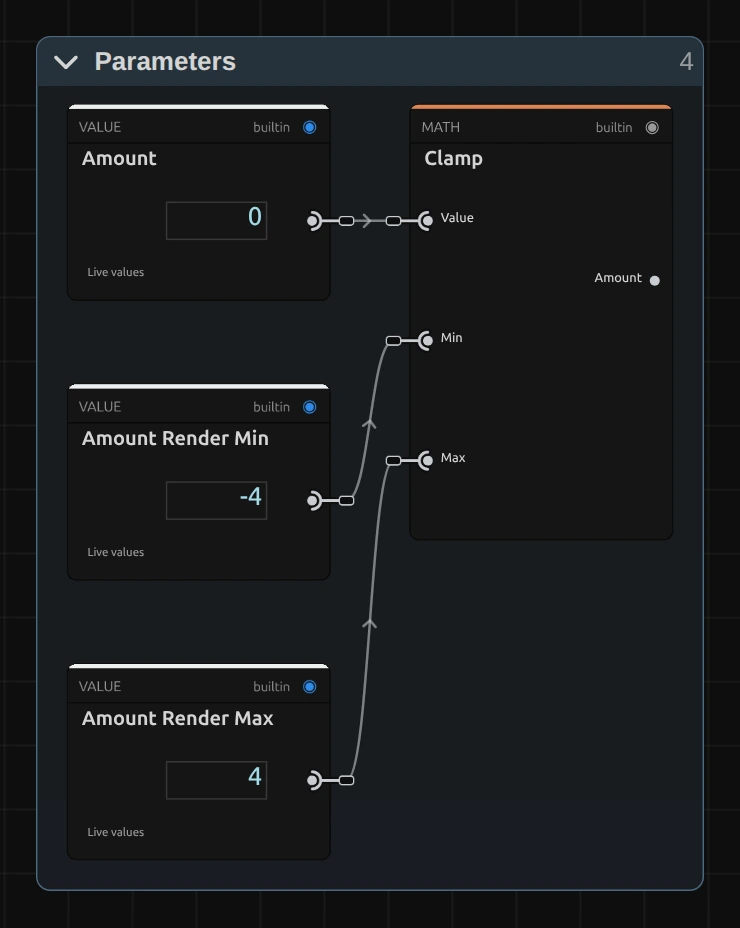
Clamp – keeps Amount between −4 and 4, the values in Amount Render Min and Amount Render Max. A keyframe, a node or the AI agent may send more; the curve then uses the limit, and the card and the tool result say so. Beyond ±4 the picture would not change visibly anyway.
Brightness Curve
Section titled “Brightness Curve”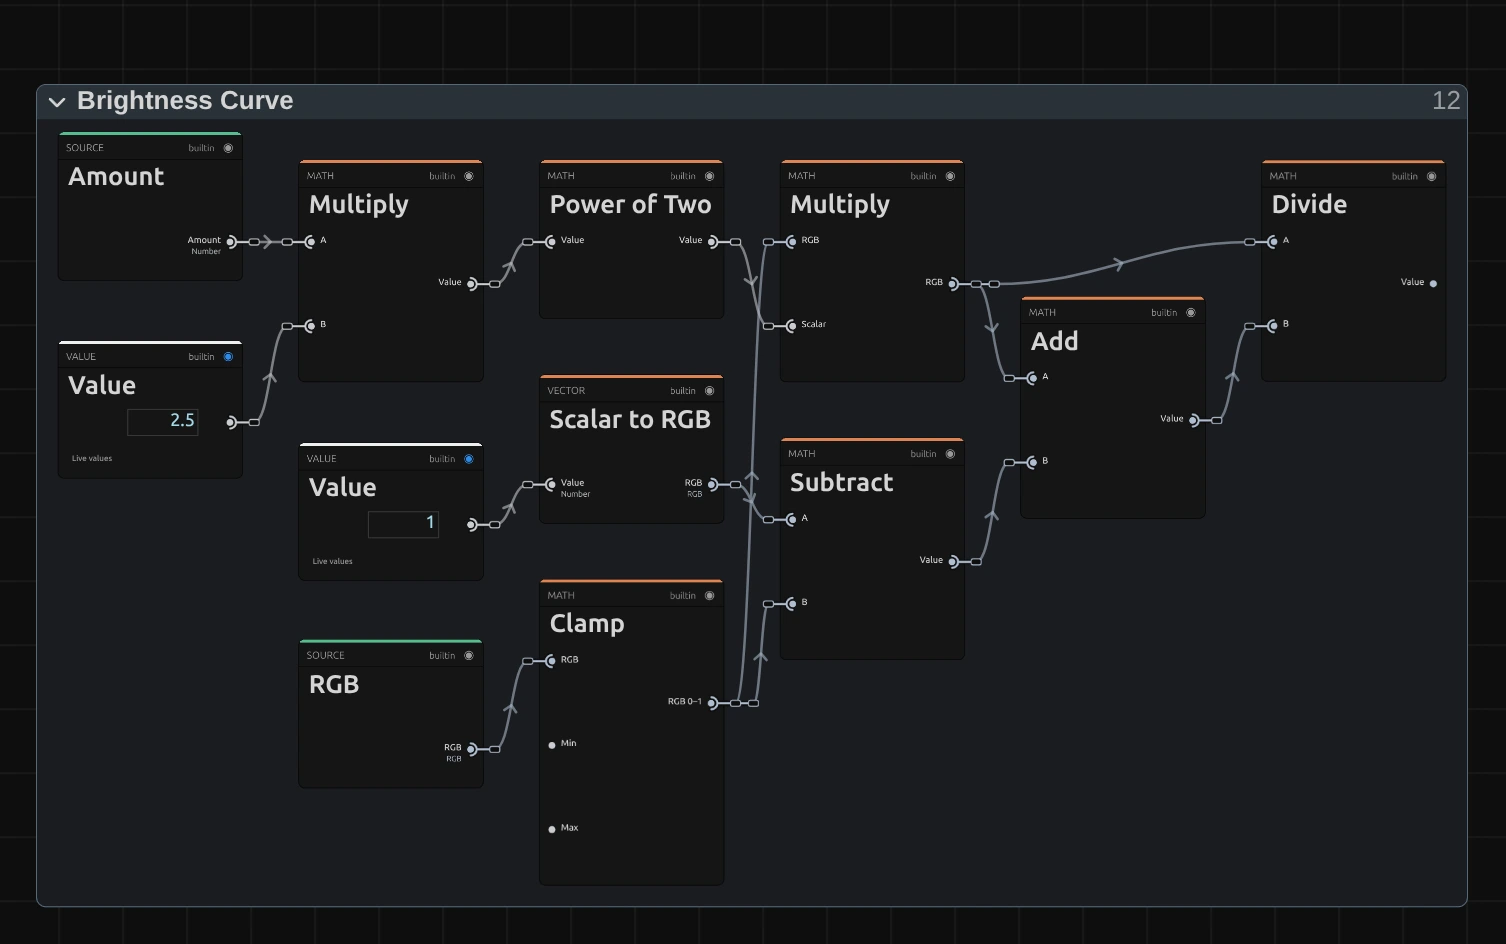
Value – 2.5, the number of stops one unit of Amount is worth. The first Multiply turns Amount into stops: Amount 1 is 2.5 stops.
Power of Two – turns the stops into a gain: 0 stops is 1 (no change), 1 stop is 2, −1 stop is 0.5.
Multiply – the one on the right multiplies each colour channel by the gain. On its own this would push bright tones past white.
Divide – divides that by itself plus the rest up to white (Subtract: 1 minus the channel, summed by Add). That squeezes the result back: 0 stays 0, 1 stays 1, and only the tones in between move. That is why Brightness has no grey veil and never clips.
Remix: set that Value (1) from 2.5 to 1.25 and the whole slider becomes half as strong, for finer control; set it to 4 for a harder push.
Technical details
Section titled “Technical details”- Formula.
y = x·m / (x·m + 1 − x)on each colour channel, withm = 2^(2.5 · Amount). It multiplies the oddsx / (1 − x)of each channel bym, so mid-grey 0.5 becomes 0.63 at Amount 0.3, 0.85 at Amount 1 and 0.15 at Amount −1. - Range. The slider covers −1 to 1; typed values, keyframes and nodes render up to ±4. Beyond that the curve uses the limit, and the inspector and the tool result say so.
- Colour. Each channel is bent on its own, so darkening deepens saturated colours a little and lightening softens them. Hue stays close; for a pure light change in linear light use Exposure.
- Transparency. Only the colour is changed; the transparency passes through untouched.
- What all colour effects share (8-bit range, saved projects, adjustment layers): Color & Tone. Formulas: Effect system; blocks: Node Catalog · Styles and presets.