
Threshold
Turns the picture into pure black and white: everything brighter than Level becomes white, the rest black. With Softness the cut gets a grey edge.
Group: Color & Tone · How to add an effect
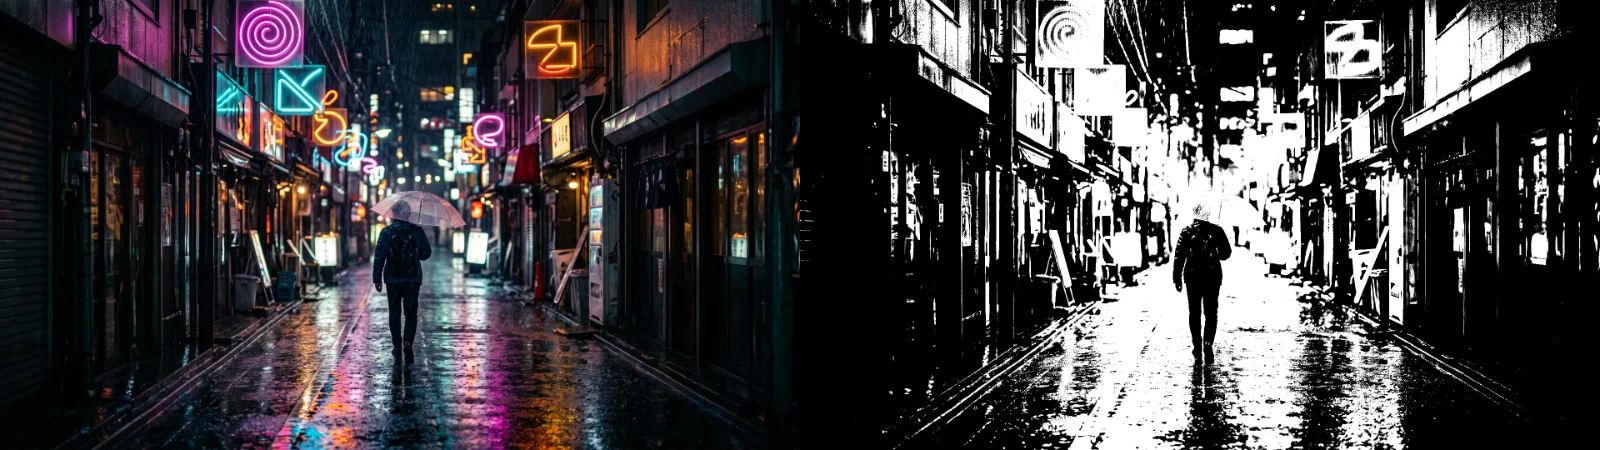
Use it for: a hard silhouette · a graphic, photocopied look · a black-and-white layer to blend over the original.
- Level – the brightness where black turns into white.
- Softness – a soft grey edge instead of a hard cut.
Tip: put Threshold on a copy of the clip above the original and set the copy’s blend mode to Screen in the Transform panel: white burns the brightest parts out, black leaves the rest as it was. With noisy footage raise Softness a little (0.05–0.1), so the edge stops crawling.
Presets
Section titled “Presets”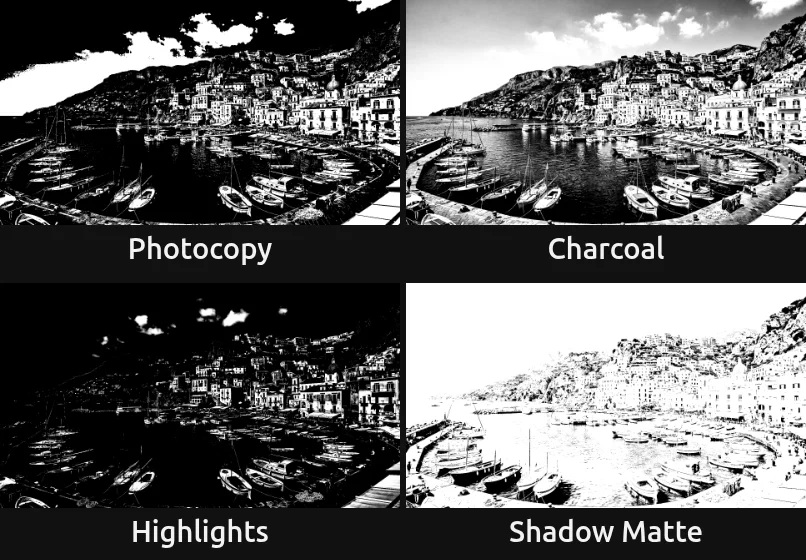
Pick one in the Preset row of the effect card. It sets both controls in one undo step, and the row then shows its name until you change a value. A keyframed control keeps its keyframes, and the card says so.
Photocopy – a hard cut set a little dark (Level 0.6, Softness 0), like a copy machine turned up too far: the mid-tones drop into black and only the lighter half of the picture stays white. Clear shapes, no grey at all.
Charcoal – a wide soft edge (Level 0.45, Softness 0.35): the bright and dark parts are still black and white, but everything in between keeps grey half-tones, like a charcoal drawing. Faces and folds stay readable.
Highlights – only the brightest lights stay white (Level 0.75, Softness 0.08): lamps, neon, a spotlight on skin, light on water. Over the original in Screen mode only the lights burn out.
Shadow Matte – everything except the deepest shadows turns white (Level 0.2, Softness 0.06). Dark figures stand out as black shapes against a white world. Over the original in Multiply mode only the shadows sink into solid black.
Controls
Section titled “Controls”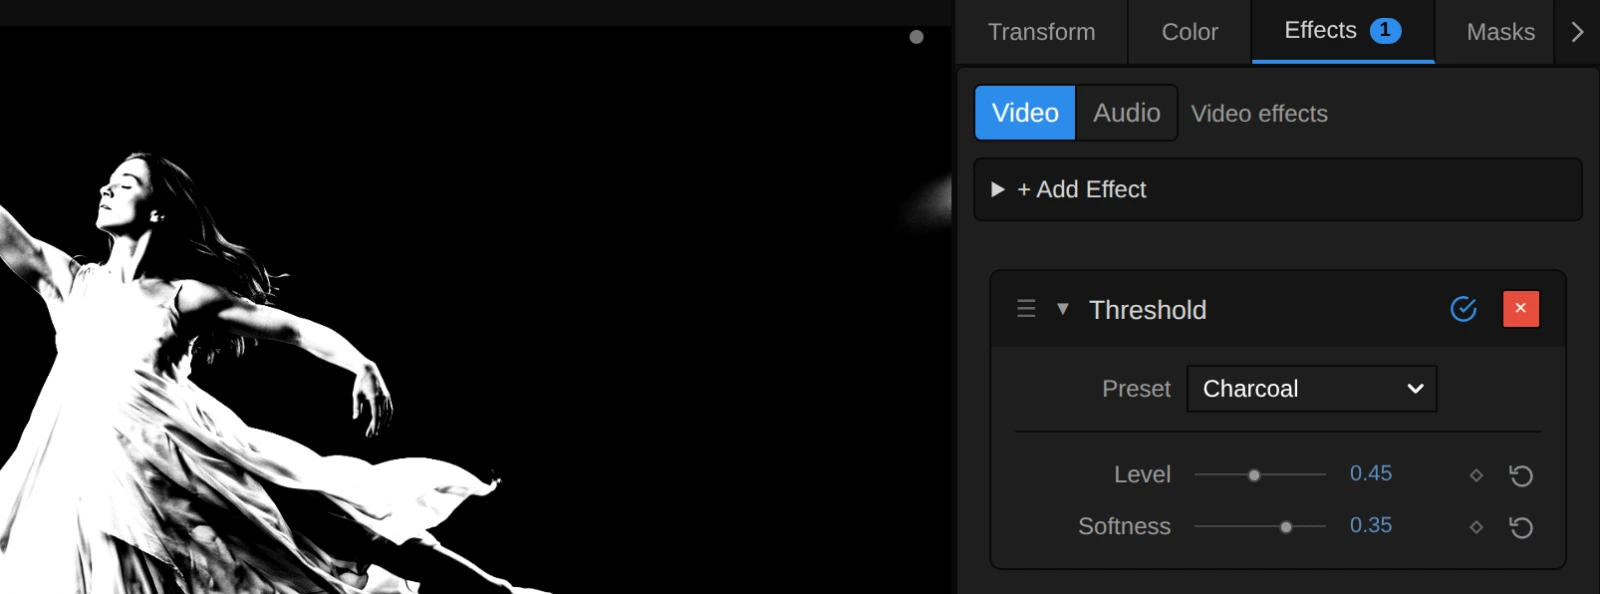
Preset – one of the four starting points above; it sets both controls.
Level – the brightness where black turns into white, measured like the eye sees it (green counts most, blue least). Low values make almost everything white and leave only the darkest shadows black; around 0.5 (the default) a figure in a spotlight becomes a clean white silhouette; from about 0.7 only the brightest lights are left. At 1 everything is black, since nothing is brighter than white. Animate it for a silhouette that grows out of the dark or burns away. 0 to 1, default 0.5. A driving node (LFO, Math) or the AI agent’s effect update may send a value outside: below 0 everything turns white, above 1 everything black.
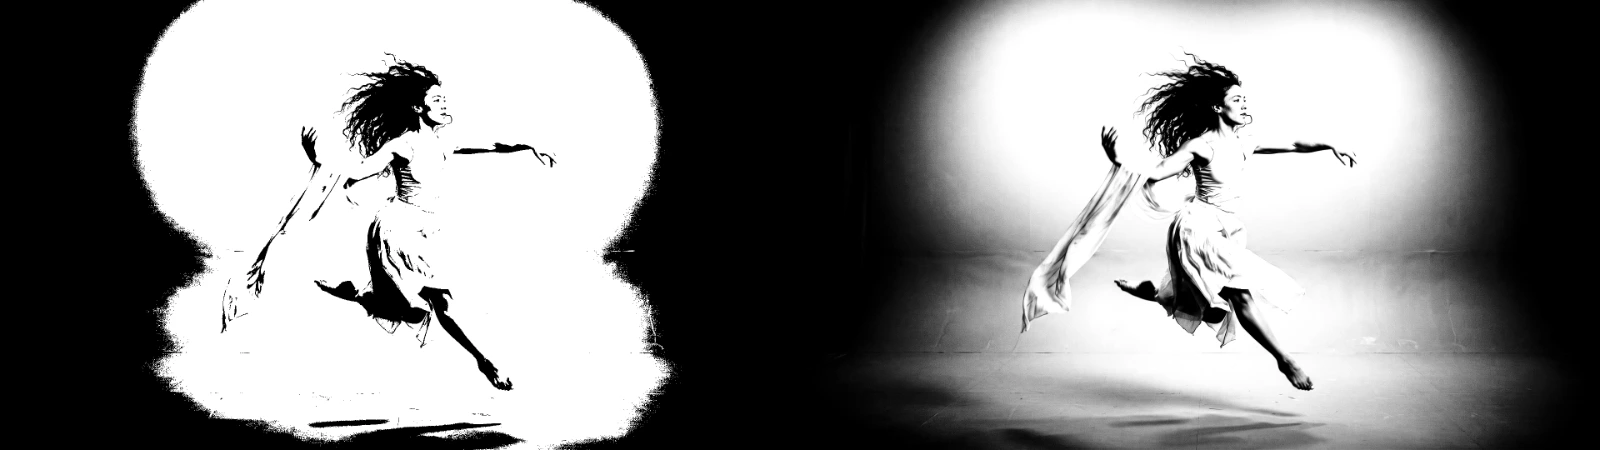
Softness – turns the hard cut into a smooth grey ramp, centred on Level. At 0 (the default) every pixel is pure black or pure white, and where the picture is noisy the edge breaks into grainy, flickering borders. 0.05–0.1 only smooths that edge; 0.2–0.35 keeps grey shading in faces and fabric, like a drawing; at 0.5 the ramp spans half the brightness range and the picture comes close to a high-contrast black-and-white photo. Because the ramp is centred, a wide Softness with Level near 0 or 1 turns even pure black (or pure white) grey. 0 to 0.5, default 0. A value below 0 is used as 0, and the card says so. A driving node (LFO, Math) or the AI agent’s effect update may send more than 0.5, which widens the ramp further.
Node setup
Section titled “Node setup”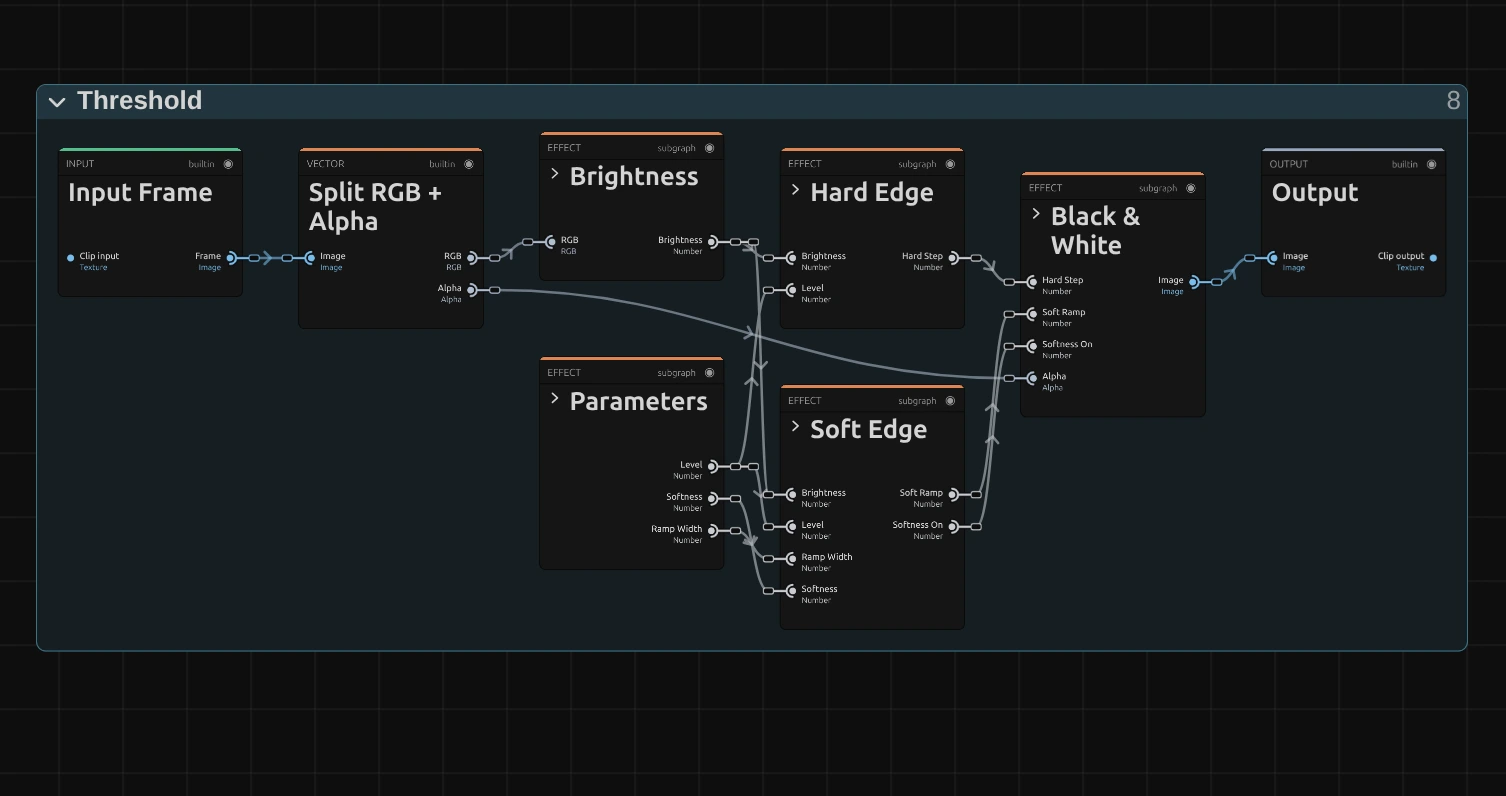
Threshold works as a short path of stages, one folder each: Parameters holds the two controls, Brightness measures each pixel, Hard Edge and Soft Edge work side by side on that brightness, and Black & White picks one of them and turns it back into a picture with its transparency. Click a folder’s header to open it; the sections below show what is inside.
Parameters
Section titled “Parameters”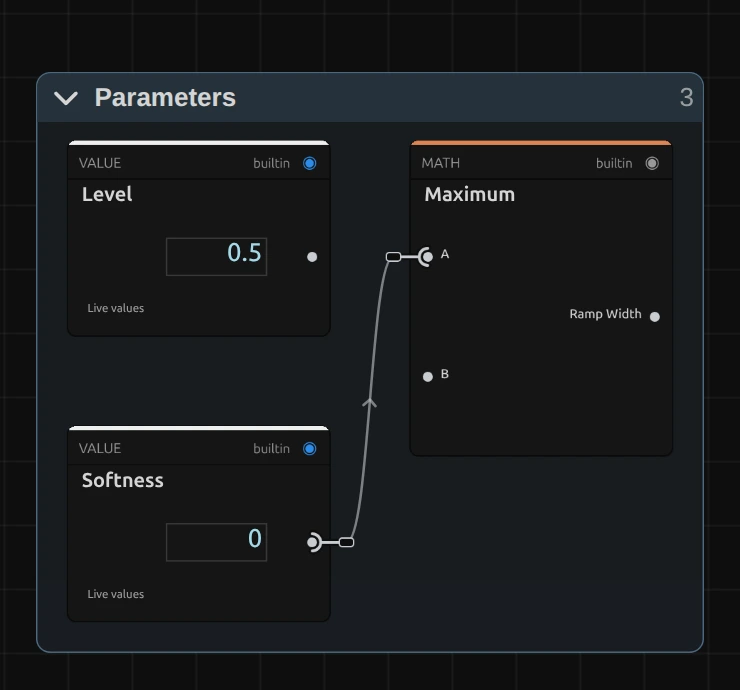
Level and Softness are the two controls of the card. Level goes on as it is.
Maximum – Softness, but never below 0.0001 (the Ramp Floor in Constants): the Ramp Width. The Soft Edge divides by this width, so it must not be 0; at Softness 0 the soft edge is switched off anyway (see Black & White).
Brightness
Section titled “Brightness”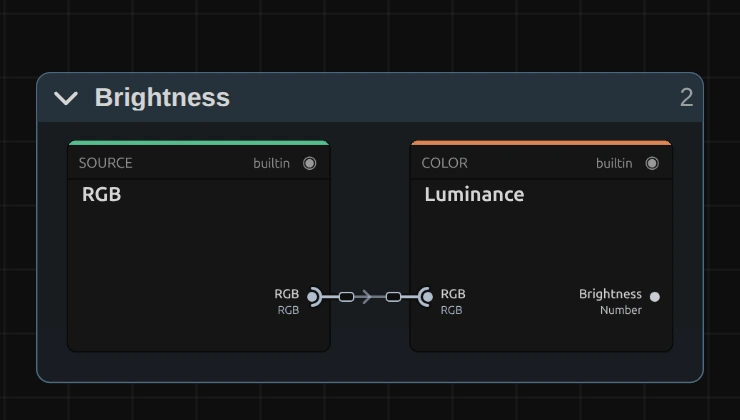
Luminance – turns the colour of each pixel into one number from 0 to 1, weighted like the eye sees it (Rec. 709: green counts most, blue least). A pure green is much brighter here than a pure blue, so it turns white sooner. Both edges read this number.
Hard Edge
Section titled “Hard Edge”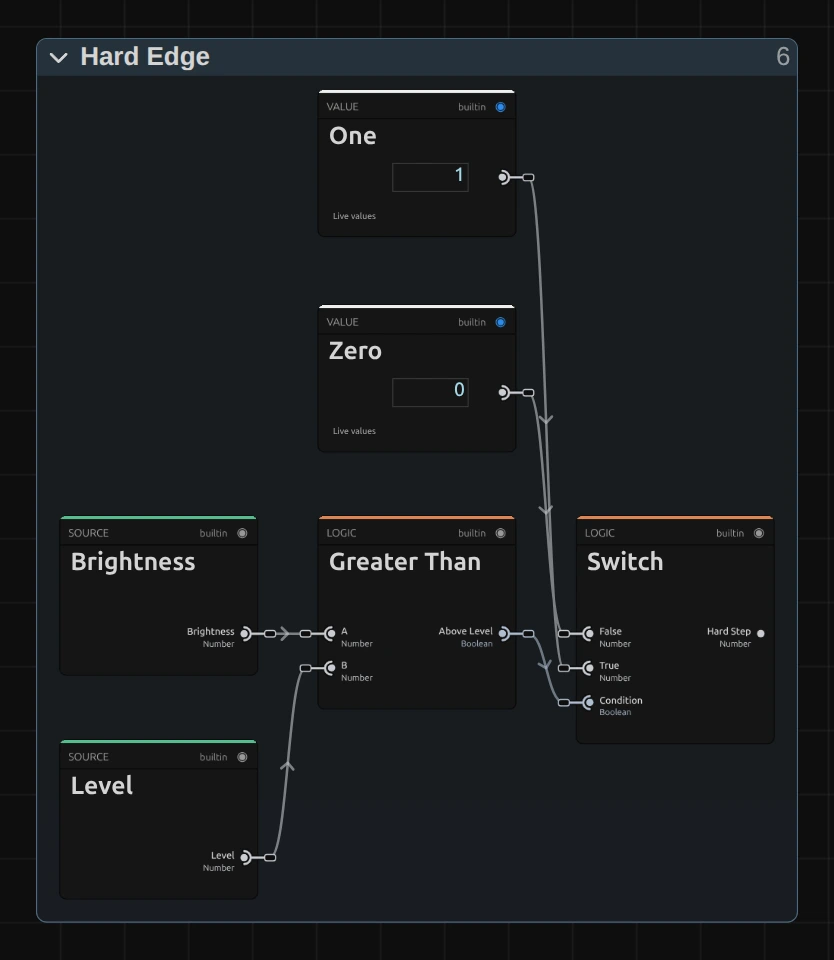
Greater Than – asks for each pixel whether its brightness is above Level: Above Level is true or false. A pixel exactly at Level counts as not above, which is why Level 1 leaves even pure white black.
Switch – turns that answer into a value: One (white) when it is true, Zero (black) when it is false. This is the Hard Step, the plain cut.
Remix: with Softness at 0, swap the two cables at the Switch: One into False and Zero into True. The bright parts then turn black and the dark parts white, a negative of the cut.
Soft Edge
Section titled “Soft Edge”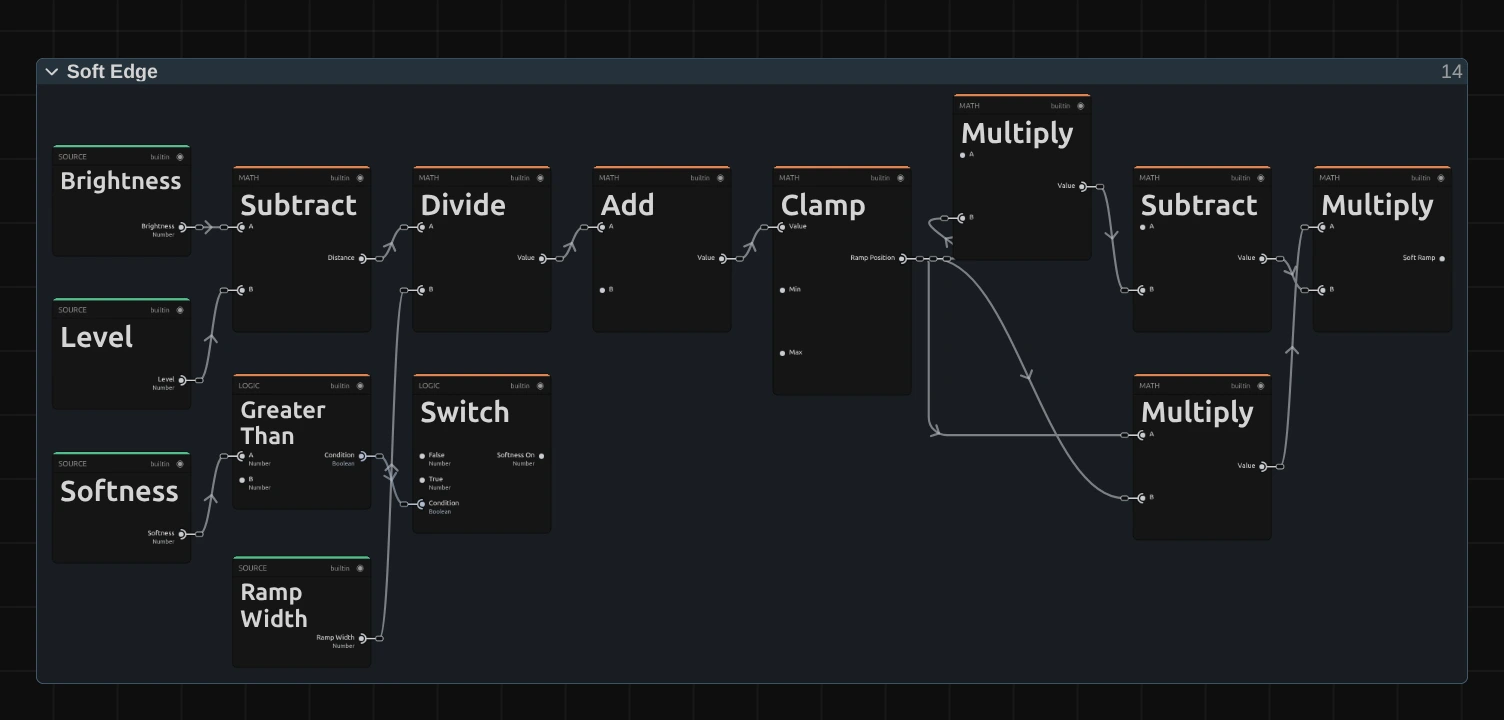
Subtract – the brightness minus Level: the Distance of each pixel from the cut, negative below it and positive above it.
Divide – divides that distance by the Ramp Width: at Softness 0.35 the ramp is 0.35 wide, and the distance now counts in ramp widths. Add then moves it up by a half, so Level itself sits in the middle of the ramp.
Clamp – keeps the result between 0 and 1: the Ramp Position, 0 below the ramp, 1 above it, and in between on the ramp itself.
Multiply – the last of three Multiply cards that bend the Ramp Position into a smooth S-curve, t × t × (3 − 2 t), the Soft Ramp: it starts and ends flat, so the grey edge has no visible corner where it meets black or white.
Switch – 1 when Softness is above 0, else 0 (Greater Than asks the question): Softness On.
Black & White
Section titled “Black & White”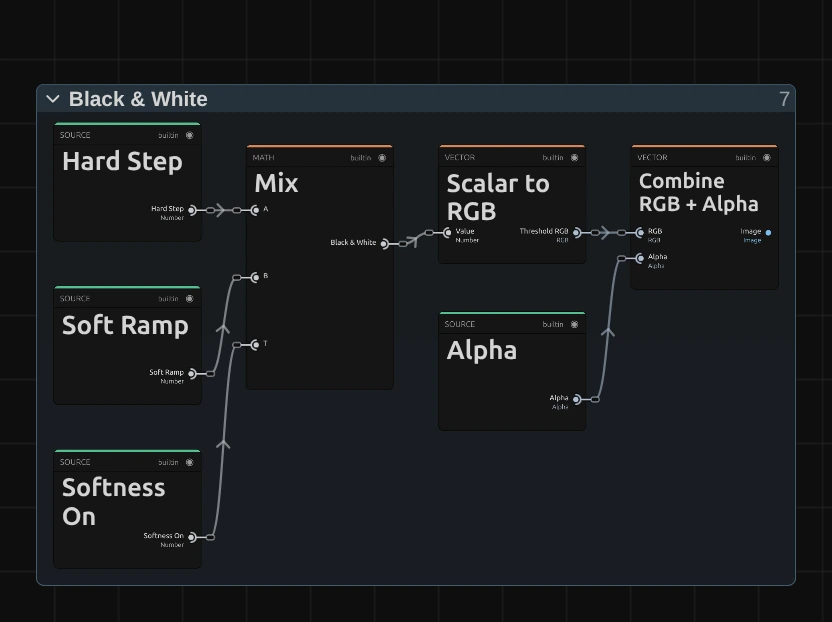
Mix – takes the Hard Step when Softness is 0 and the Soft Ramp above it. So Softness 0 is exactly the plain cut, without any rounding.
Scalar to RGB – puts that one value into red, green and blue alike: black, white or a grey in between, the Threshold RGB.
Combine RGB + Alpha – joins it with the original transparency, untouched. A cut-out keeps its shape, and a soft edge stays soft.
Technical details
Section titled “Technical details”- Formula. With
ythe Rec. 709 brightness of a pixel andL= Level: white wherey > L, black elsewhere. Softnesssabove 0 replaces the cut withsmoothstepoverL − s/2 … L + s/2; Softness 0 is pixel-identical to the earlier hard step. - Limits. Softness below 0 renders as 0 (hard), and the card and the tool result say so. Level is used as it is: below 0 everything is white, from 1 everything black.
- Transparency. Only the colour is replaced; the transparency passes through untouched.
- Saved projects. Untouched earlier Threshold graphs become the current recipe; edited ones stay as saved. A saved graph that already has its folders keeps them (an older one: one Color Processing folder); a newly added Threshold opens with the stage folders above. The picture is the same either way.
- What all colour effects share (8-bit range, adjustment layers): Color & Tone. Formulas and history: Effect system; blocks: Node Catalog · Styles and presets.