
Vignette
Darkens the edges and corners so the eye goes to the middle of the frame. Subtle, it calms busy edges; strong, it looks like an old lens, a follow spot or a keyhole.
Group: Light & Stylize · How to add an effect
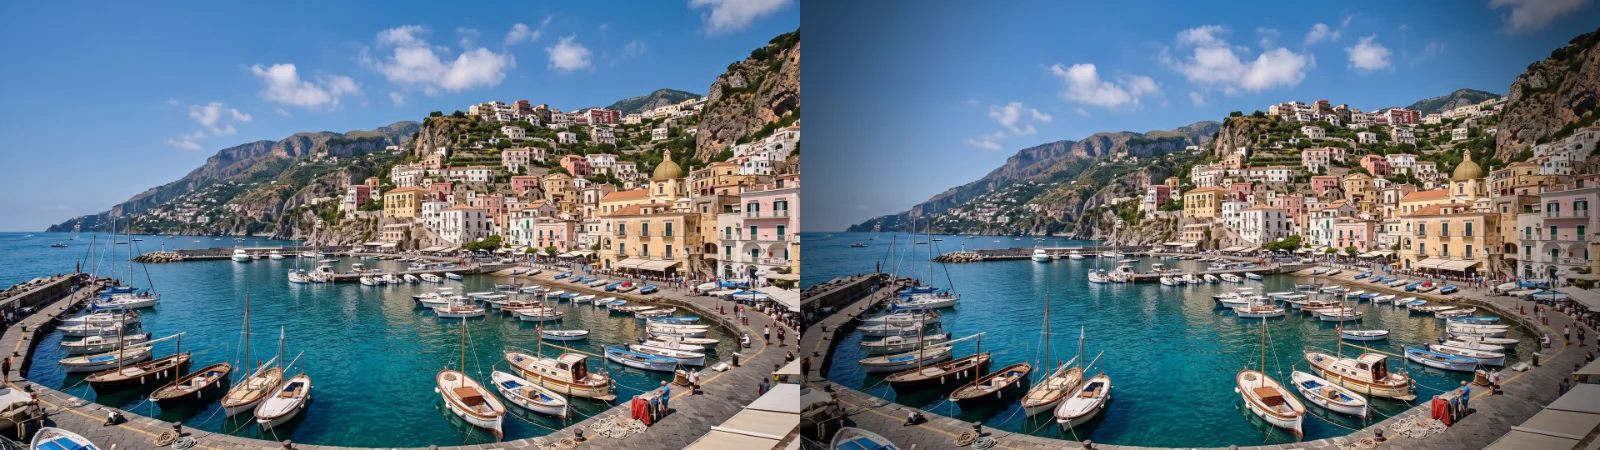
Use it for: guiding the eye to a performer · an old-lens or memory look · softening the frame edge of a projection.
- Amount – how dark the edges get.
- Size – where the darkening begins: smaller values start it closer to the middle.
- Softness – how gradually it fades in.
- Roundness – 1 is a circle, 0 follows the shape of the frame.
Tip: keyframe Size of the Iris preset from 0 up to 0.7 to open the picture like an iris in a silent film.
Presets
Section titled “Presets”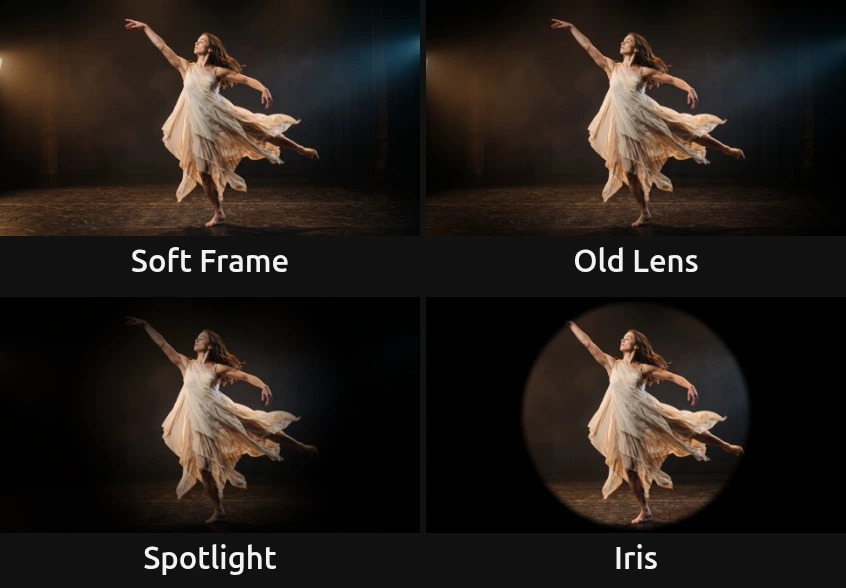
Pick one in the Preset row of the effect card. It sets all four controls in one undo step, and the row shows its name until you change something. A control with keyframes keeps them, and the card says so.
Soft Frame – barely noticeable: the corners settle a little and busy edges calm down, without the picture looking treated. A good default for almost any shot.
Old Lens – dark corners that follow the shape of the frame, like an old or wide-open lens. For memories, archive looks and night scenes.
Spotlight – a round pool of light in the middle and darkness around it, like a follow spot on a stage. It isolates a performer in the middle of the frame.
Iris – a hard black circle, the iris shot of silent film. Keyframe Size to open or close it at the start or end of a scene.
Controls
Section titled “Controls”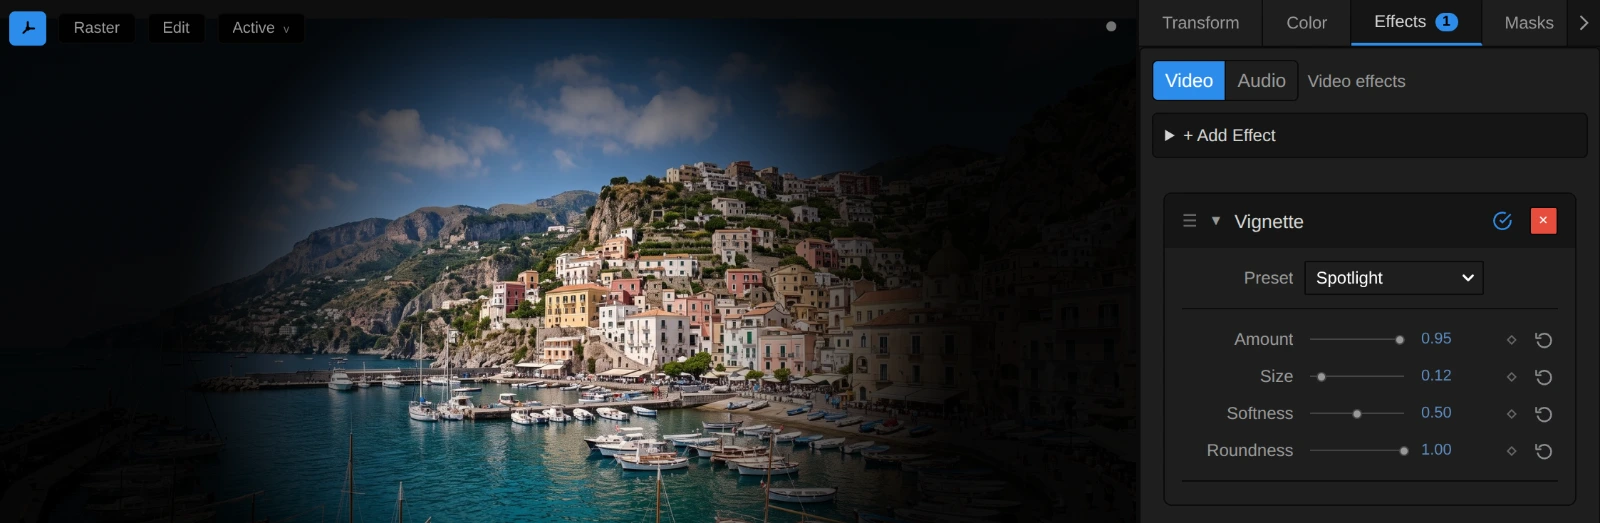
Preset – a starting point for all four controls; see Presets.
Amount – how dark the edges get. 0.3 is barely noticeable, the default 0.5 a clear but natural darkening, and at 1 the darkest part goes fully black, for a spotlight or an iris. Only the colour gets darker; transparent parts stay transparent. 0 to 1, default 0.5.
Size – where the darkening begins, measured from the middle (0) to the corners (1). At the default 0.5 it begins about where a circle would touch the top and bottom of a 16:9 frame; at 0.1–0.2 only the middle stays bright. The slider ends at 1, where the darkening starts at the corners. Animate it for an iris that opens or closes. 0 to 1, default 0.5.
Softness – how gradually the darkening fades in, from where Size begins to how far it reaches. At 1 it fades over the whole frame, gentle as a lens; around 0.5 it is a clear soft ring; at 0 it is a hard edge, only one and a half pixels wide, for an iris or a keyhole. Size plus Softness above 1 means the corners are only partly dark. 0 to 1, default 0.5.
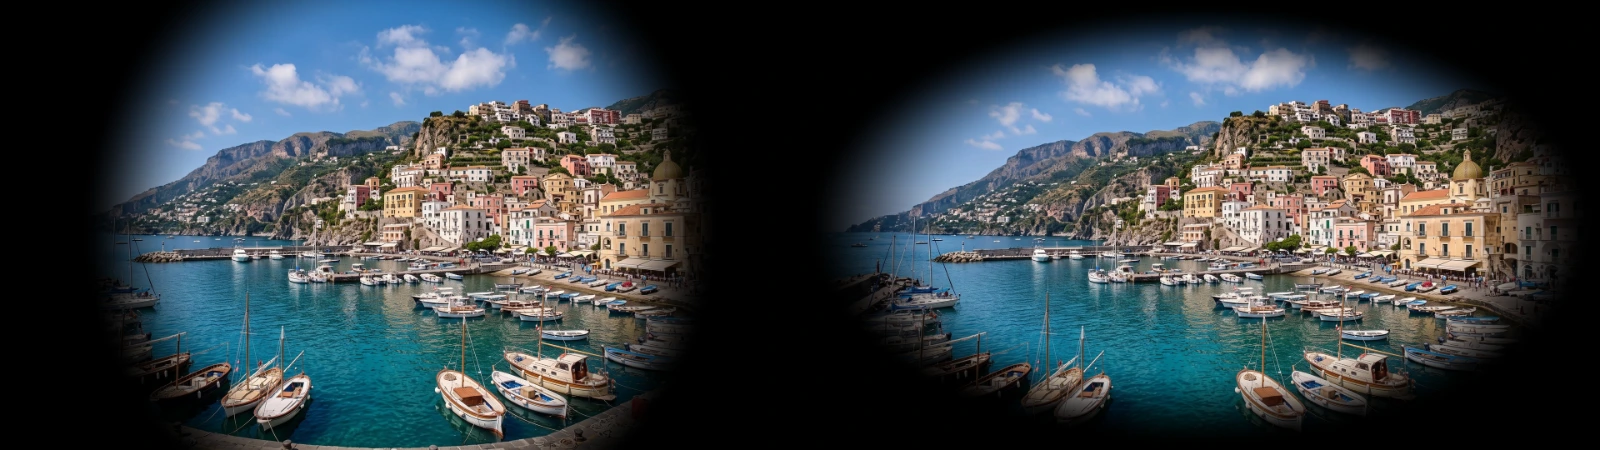
Roundness – the shape of the bright middle. At 1 it is a true circle on any frame, wide or portrait, like a spotlight. At 0 it is an oval that follows the frame and touches all four edges at once, so mostly the corners darken, like a lens. Values between blend the two; 0.5–0.7 looks the most natural on a wide frame. 0 to 1, default 1.
Node setup
Section titled “Node setup”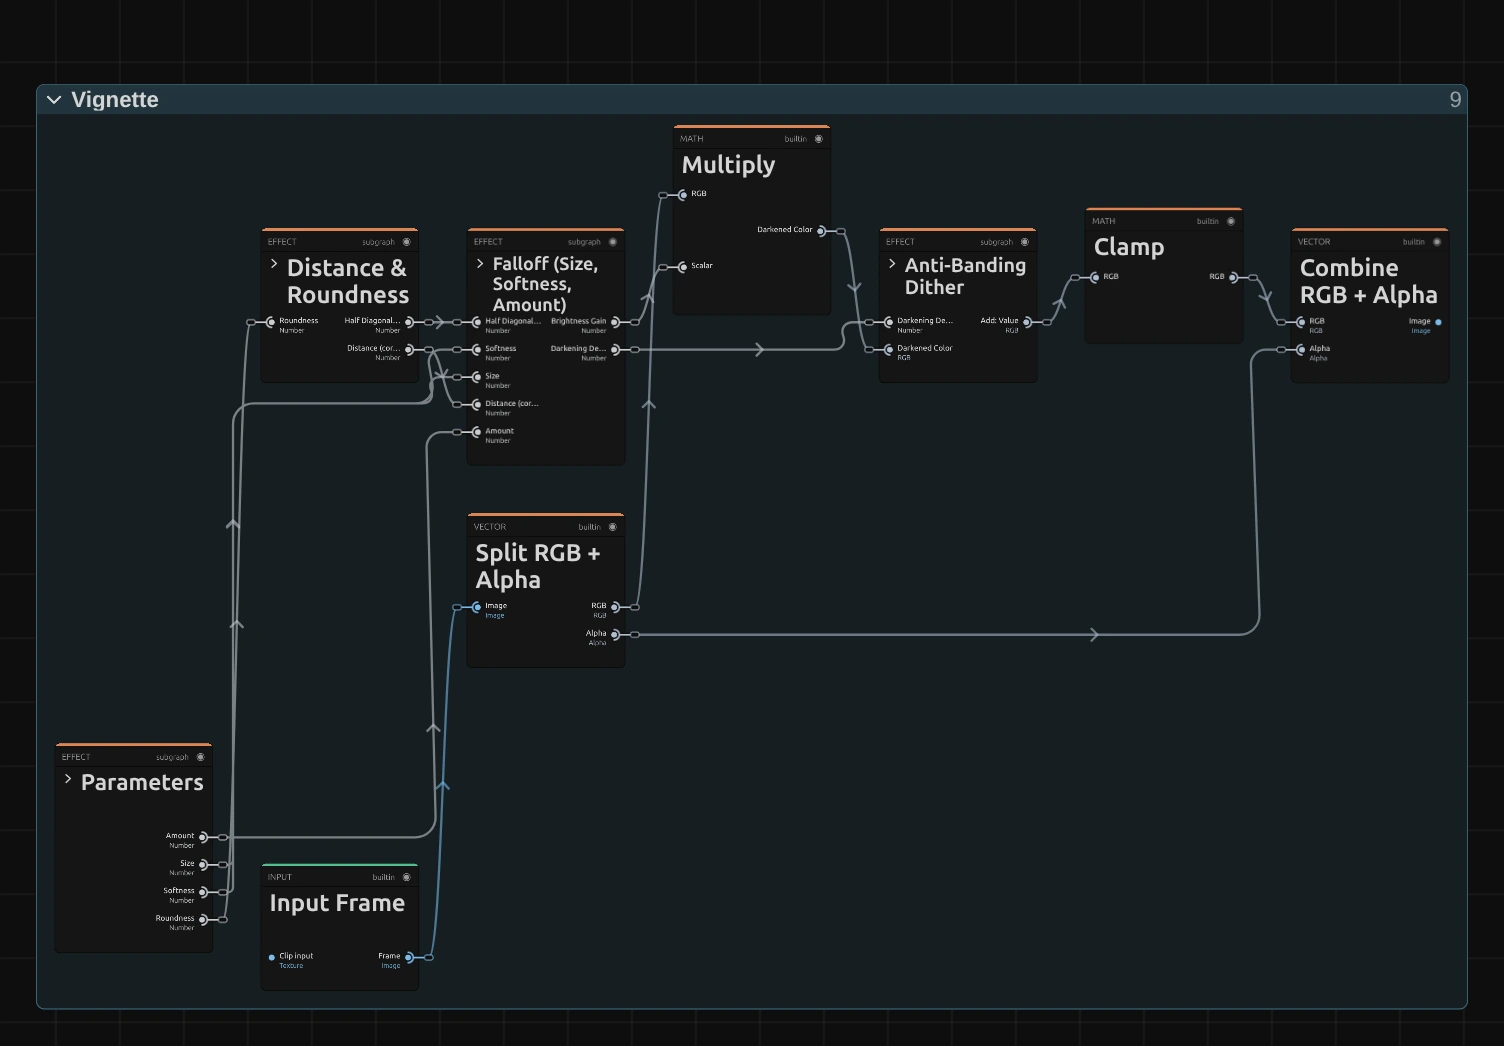
Vignette is one pass over the picture. Distance & Roundness measures how far each pixel is from the middle, with every corner at 1. Falloff turns that distance into a brightness gain from Size, Softness and Amount, and Multiply darkens the colour by it. Anti-Banding Dither adds a trace of noise where the gain changes, so a smooth dark background shows no rings. Clamp and Combine RGB + Alpha then put the untouched transparency back. Click a folder’s header to open it.
Distance & Roundness
Section titled “Distance & Roundness”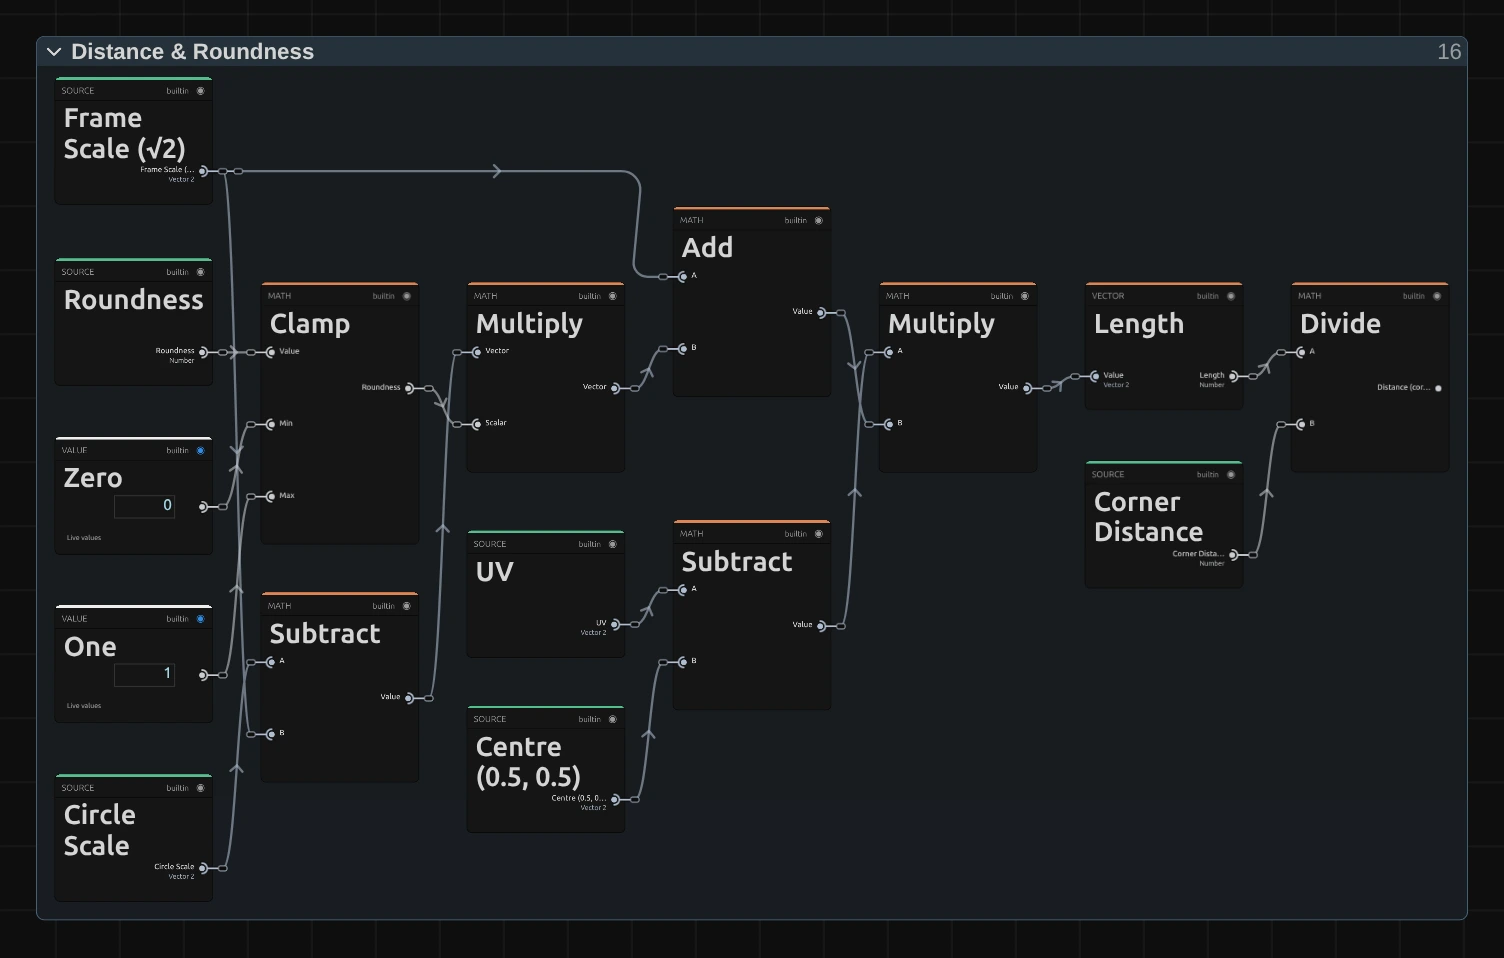
Subtract – the pixel’s position minus the Centre (0.5, 0.5): how far it lies from the middle of the frame, across and down.
Add – the scale for each axis. Frame Scale (√2) on both axes gives an oval that follows the frame; Circle Scale (each side divided by half the diagonal) gives a circle in pixels. The Clamp, Subtract and Multiply before it blend the two by Roundness.
Multiply – the offset from the middle in that scale, so a wide frame and a portrait frame measure in the same pixels.
Length – the straight-line distance from the middle.
Divide – divides by the Corner Distance, the distance the same scale gives a corner. Every corner is therefore at exactly 1 on any frame and at any Roundness, which is what Size counts in.
Remix: to put the bright middle on a performer who stands off centre, replace the Centre (0.5, 0.5) card that feeds Subtract with a Combine Vector of X 0.35 and Y 0.5: the vignette moves left. The corners are then no longer all at 1: the near side darkens less, the far side more.
Falloff (Size, Softness, Amount)
Section titled “Falloff (Size, Softness, Amount)”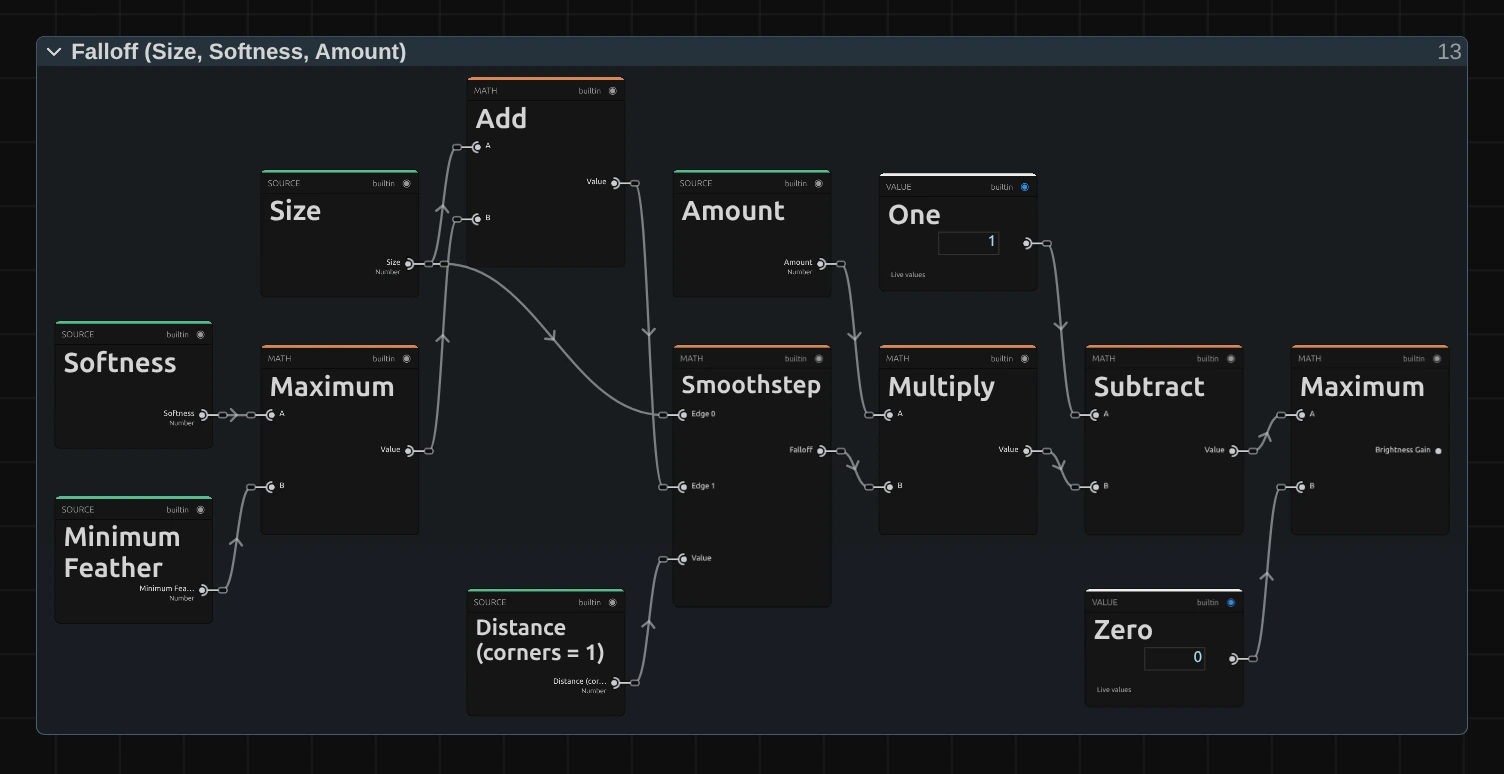
Maximum – the width of the ring: Softness, but never less than the Minimum Feather of one and a half pixels. That is why Softness 0 still gives a clean edge without stair steps.
Smoothstep – 0 inside Size, 1 beyond Size plus that width, with a smooth S-curve between: how far into the darkening each pixel lies.
Multiply – that share times Amount: how much each pixel darkens.
Subtract – 1 minus the darkening, the Brightness Gain. The Maximum after it keeps it from going below 0 when Amount is typed above 1.
Anti-Banding Dither
Section titled “Anti-Banding Dither”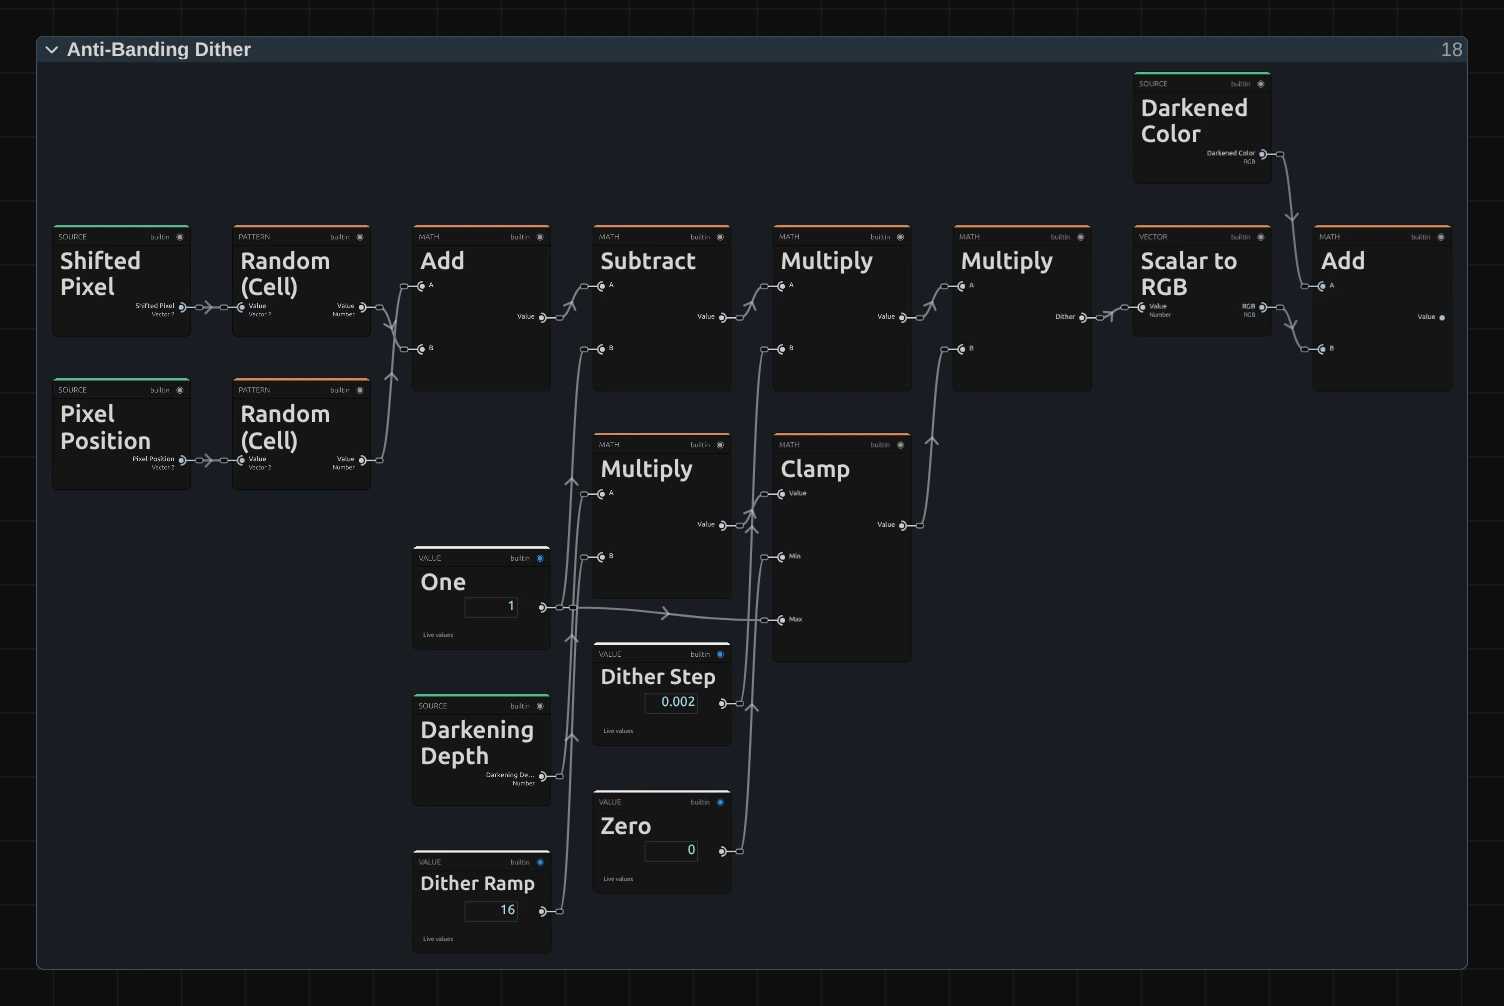
A dark, smooth gradient has only a few 8-bit steps to go through, so a wide vignette over a black stage can show faint rings. This folder hides them with noise far too small to see.
Random (Cell) – a fixed random number for every pixel; a second one reads a shifted pixel. The pattern stays the same from frame to frame, so it never shimmers.
Subtract – the sum of both random numbers minus 1: a noise that lies around 0 and is most often small. The Multiply cards after it scale it to at most half an 8-bit step (Dither Step 0.002).
Clamp – how much the darkening at this pixel asks for dither: the Darkening Depth times 16, limited to 0–1. Where Vignette leaves the picture alone, the picture stays exactly as it was.
Add – adds the noise to the Darkened Color from Multiply.
Remix: to see the rings the dither prevents, drag the cable from Multiply (the Darkened Color) straight into the top-level Clamp, past Anti-Banding Dither, and give the Vignette a wide Softness over a dark background.
Technical details
Section titled “Technical details”- Distance. Measured in pixels from the middle of the layer, normalized so every corner is at 1 on any size and aspect. Roundness blends the per-axis scale from
√2(frame-shaped oval) toside / half diagonal(circle). - Falloff.
gain = max(0, 1 − Amount · smoothstep(Size, Size + max(Softness, 1.5 px), distance)), applied to the colour; alpha is kept. - Dither. Triangular, at most half an 8-bit step, fixed per pixel, and only where the gain differs from 1 (full from a darkening of 1/16).
- Warnings. Size at or above 1 (nothing darkens), Softness below 0, Roundness outside 0–1 and Amount above 1 are reported in the effect card and the tool result.
- Size above 1. The slider and the AI keyframe tool stop at 1. The number field and the AI effect-update tool still take up to 1.5, for Vignettes saved before 2026-10-21, whose corners sit at about 1.41; on the current Vignette a Size of 1 or more darkens nothing, and the card and the tool result say so.
- Saved projects. A Vignette saved before 2026-10-21 keeps its earlier look (its Roundness 0.5–2 stretched the frame-shaped oval vertically, and its Size reached to about 1.41 at the corners); its card offers Use the new Vignette (resets its shape), which resets Size, Softness and Roundness and removes their keyframes, in one undo step.
- Transitions. The Vignette Bloom transition uses the current Vignette (Roundness 0, with Size and Softness ÷ √2, which gives the transition its familiar falloff).
- Software preview. Without a graph (as transitions create it) the worker software renderer uses the current pixel distance without the dither.
- Shared notes: Light & Stylize. Formulas: Effect system; blocks: Node Catalog.