
Dither Studio
Reduces the image to two ink colors using a selectable dither pattern (Bayer 2, Bayer 4 or Checker); Kernel picks the pattern, Scale its size.
Group: Print & Halftone · How to add an effect
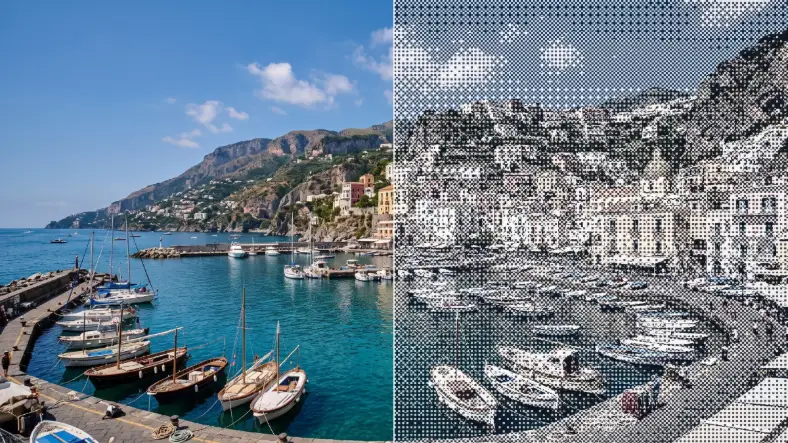
A short page made from the editor’s effect catalog: what the effect does and its controls. Tips and its node setup will follow.
Controls
Section titled “Controls”| Control | Range | Default |
|---|---|---|
| Pattern | ||
| Scale | 2 to 80 | 14 |
| Kernel | bayer 2, bayer 4, checker | bayer 4 |
| Mix | ||
| Amount | 0 to 1 | 0.75 |
| Color | ||
| Ink | a colour | #111827 |
| Paper | a colour | #f8fafc |
Styles: the Style menu in the effect card switches to another look of the same engine. Controls you changed keep their values and keyframes when the new look has the same control, also under another name; the others start at the new look’s defaults. Looks of Print & Halftone: Dithering, Halftone, Paper Print, Pattern Halftone, Riso, Riso Glow, Tone Geometry. Further looks under Lens & Distort (4), Pixel & Mosaic (2), Lines & Engraving (6), Textile & Craft (3), Analog & Glitch (4), 3D & Particles (1).
Technical details
Section titled “Technical details”Dither Studio is one look of the pattern engine; its looks share one node setup. How effects are stored, rendered and exported: Effect system. Its building blocks: Node Catalog.