
Lens Correction
Repairs what a camera lens does to a picture: bowed lines, coloured fringes along hard edges and dark corners.
Group: Lens & Distort · How to add an effect
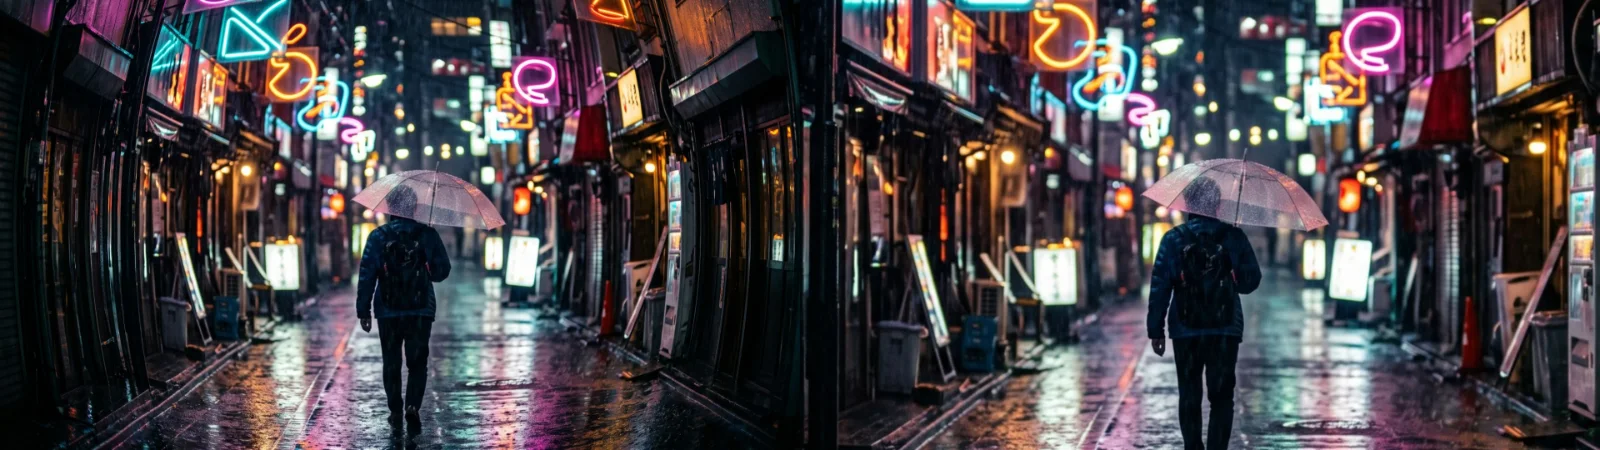
Use it for: straight walls, door frames and horizons in wide-angle or action-cam shots · a photo of the set that has to line up with its real edges in a projection · colour fringes and dark corners from a cheap or very wide lens.
- Distortion – straightens lines that bow: below 0 for a wide lens, above 0 for a long one.
- Scale – zooms in or out after the correction.
- Framing – keeps the frame size or shows the whole photo.
- Amount (Vignette) – lifts dark corners.
Tip: put Lens Correction first in the effect stack, before Guided Perspective and every look. Lines that still lean after it come from the camera’s tilt, not from the lens: Guided Perspective straightens those.
Presets
Section titled “Presets”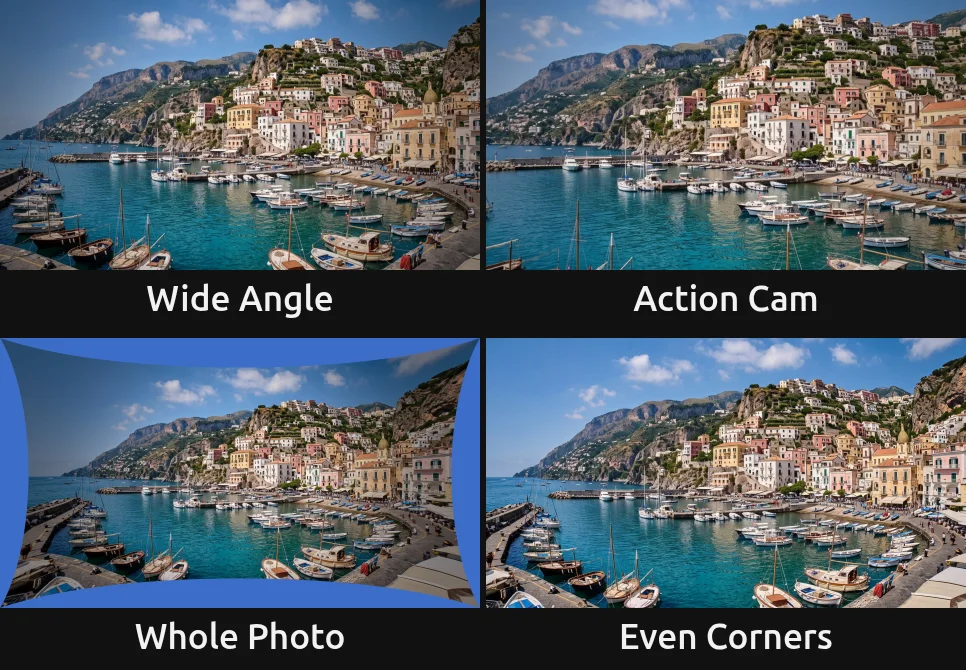
Pick one in the Preset row of the effect card. It sets all controls at once, in one undo step, and the row then shows its name until you change something. A control with keyframes keeps them, and the card says so. A preset also sets Lens back to Manual: on a Canon raw photo with the measured profile, pick the preset first and the lens afterwards (the card reads the focal length from the file again).
Wide Angle – Distortion −14: the gentle bow of a 16–24 mm lens or a phone’s wide camera. The frame stays full, the outer edge is cropped a little.
Action Cam – Distortion −28 and Scale 120: the strong barrel of an action camera or a very wide zoom. Scale enlarges the picture into the part that comes out straight.
Whole Photo – Distortion −14 with Framing on Fit entire photo: the Wide Angle correction, but nothing is cropped. The picture shrinks into a cushion shape with empty, transparent edges; fill them with AI Edge Fill or a background track. It stops at −14 on purpose: a stronger correction with Fit stretches the outer picture instead of straightening it (see Distortion).
Even Corners – Amount 40, Midpoint 30: lifts dark lens corners without touching the geometry; the bent lines stay. Good for photos of a white cyc or a projection surface that should look evenly lit.
Controls
Section titled “Controls”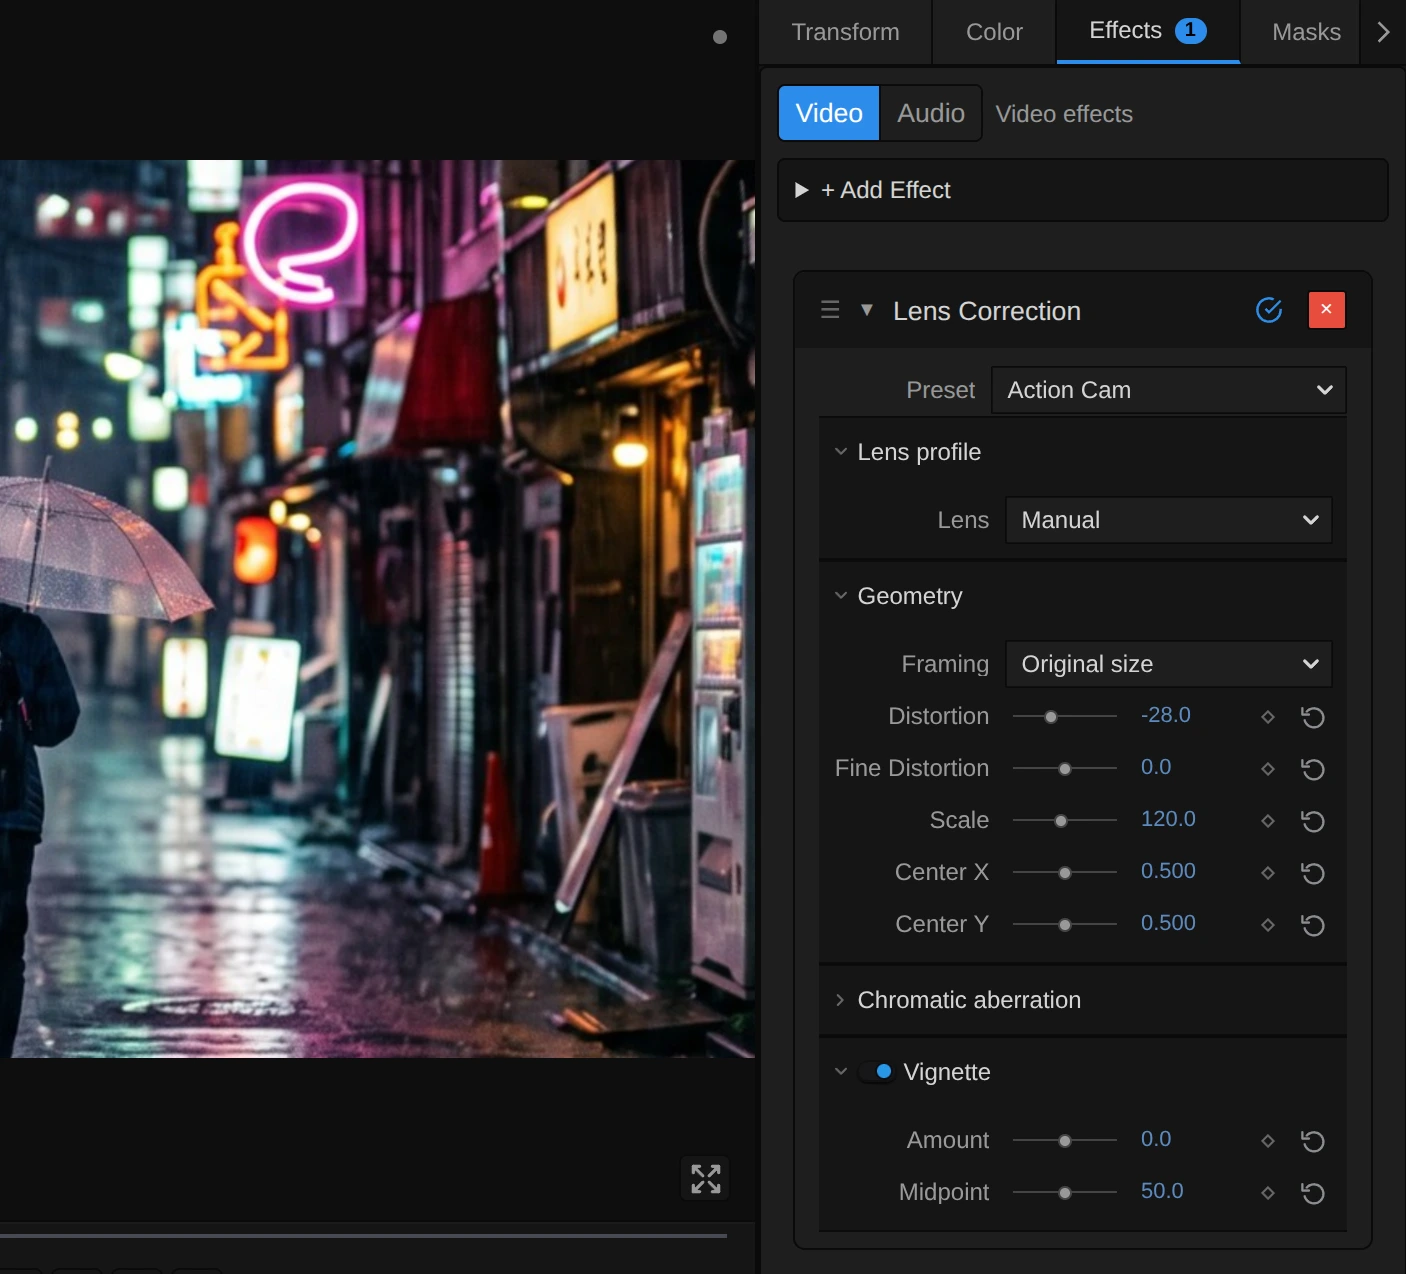
Preset – a starting point for the whole card; see Presets.
Every number can be keyframed. Work on a frame with long straight lines (a door frame, the edge of a stage, a horizon) and watch those lines while you drag.
Lens profile
Section titled “Lens profile”Lens – a measured lens or Manual. Manual leaves the picture alone until you set the controls below. Canon EF 24-105mm f/4L IS USM (the original EF lens, not the II or RF versions) applies measured corrections for its distortion, colour fringes and dark corners; on a Canon raw photo (CR2) it reads the focal length and aperture from the file, and the card shows the lens it found. The manual controls add to the profile. Manual, Canon EF 24-105mm f/4L IS USM, default Manual.
The next four rows appear only with a measured lens.
Focal Length – the zoom setting the picture was taken at. The profile’s distortion changes a lot along the zoom: barrel at 24 mm, almost none around 40 mm, a slight inward bow at 105 mm. 24 to 105 mm, default 24 mm.
Aperture – the f-number the picture was taken at. It changes only the dark corners: they are darkest wide open at f/4 and get lighter as the lens is stopped down. With the Vignette switch off it has nothing to change, so the row is dimmed and a note says so. f/4 to f/22, default f/4.
Focus Distance – how far away the camera was focused, in metres. It also changes only the dark corners, and only a little, so it is dimmed with Aperture while the Vignette switch is off; leave it at 1000 m (as good as infinity) when you do not know it. 0.45 to 1000 m, default 1000 m.
Sensor Crop – how much smaller the camera’s sensor is than full frame: 1 for a full-frame camera, 1.6 for a Canon APS-C body. A smaller sensor sees only the middle of the lens, so the correction is weaker. 1× to 2×, default 1×.
Geometry
Section titled “Geometry”Framing – what happens to the edges. Original size keeps the frame as it is and crops a little of the edge. Fit entire photo shrinks the corrected picture until all of the original is visible and leaves the free edges transparent. While Fit is on, the fit sets the size: choosing it puts Scale back to 100 and hides its row. A Scale other than 100 that arrives anyway (from a preset or an older project) keeps its row and a note until you click its reset arrow. Original size or Fit entire photo, default Original size.
Distortion – straightens lines that bow. Below 0 pulls the outer picture inward: lines that bulge outward like a barrel (wide lenses, action cameras) become straight. Above 0 pushes it outward: lines that pinch inward (long lenses) become straight, and empty edges appear that Scale can crop. −5 to −15 fixes a typical wide lens, −25 to −30 an action camera. Stronger values keep the photo in one piece: where the correction would stretch the outer picture more than four times, it stretches it evenly instead of folding it back. Lines in that outer part stay bent, and the card says from where on this happens. −100 to 100, default 0.
Fine Distortion – the same kind of correction, but it acts mostly at the outer edge and leaves the middle alone. Use it after Distortion when the middle is straight and the edges still bend, the “moustache” bow of some wide lenses. Strong values stretch the edge evenly, as with Distortion. −50 to 50, default 0.
Scale – zooms the corrected picture in or out around the lens centre, in percent. Above 100 crops empty or still bent edges, below 100 shows more and leaves transparent edges. 50 to 200, default 100.
Center X – where the middle of the lens lies across the frame, as a share of the width (0.5 is the middle). Move it for a photo that was cropped off-centre or shot with a shifted lens, until the bow is the same on both sides. 0 to 1, default 0.5.
Center Y – the same from top to bottom (0 is the top edge). 0 to 1, default 0.5.
Chromatic aberration
Section titled “Chromatic aberration”Red/Cyan – removes red or cyan edges along hard contrast, which grow towards the corners. It enlarges or shrinks the red picture a little around the lens centre; try one direction, and if the fringe gets wider, go the other way. 1–3 fixes most lenses, 20 moves red by about 2 % of the distance to the centre (about 20 px in the corners of an HD frame). −20 to 20, default 0.
Blue/Yellow – the same for blue or yellow edges, with the blue picture. −20 to 20, default 0.
Vignette
Section titled “Vignette”Vignette Correction – the switch in the Vignette header. Off turns off both the measured corner correction of a lens profile and Amount, and keeps their values for when you switch it on again. Distortion and fringe correction go on working. On or off, default on.
Amount – brightens or darkens towards the corners. Above 0 lifts dark lens corners, below 0 adds a dark vignette. 100 makes the corners two stops (4×) brighter, which already burns out a bright sky; 20–50 is typical. −100 to 100, default 0.
Midpoint – where the brightening starts, from the middle (0) to the corners (100). Low values spread it over the whole frame, high values keep it to the very corners; at 100 Amount has almost nothing left to act on. 0 to 100, default 50.
Node setup
Section titled “Node setup”Lens Correction is one fixed shader with its own card: it has no node graph to open. For every pixel of the result it works out how far the pixel lies from the lens centre, looks up where that point lay in the bent picture (the measured profile and Distortion, Fine Distortion and Scale), reads the red and the blue picture a little further in or out (the fringe controls), and brightens it towards the corners (Vignette).
Technical details
Section titled “Technical details”- Units. Distortion and Fine Distortion are coefficients of r² and r⁴ in percent, where r is the distance from the lens centre and 1 the distance of the frame corner. The fringe controls scale the red or blue channel by 0.1 % per step. Amount 100 brightens the corner by two stops.
- Profile. The measured lens uses Lensfun calibrations (PTLens distortion, poly3 lateral fringes, PA vignetting), interpolated across focal length, aperture and focus distance; values outside the calibration use its nearest end. The vignetting correction acts on linear light.
- Empty edges. Areas the corrected picture no longer covers are transparent.
- Strong barrel removal. The radius polynomial r(1 + k r² + f r⁴) flattens and would turn back (fold the picture) for strong negative values. From the radius where it reads less than a quarter of a source pixel per output pixel, the mapping takes the larger of a straight line at that slope and the polynomial. It always moves outward, every source radius is reached, and where the polynomial recovers (negative Distortion with positive Fine Distortion) it takes over again, so dragging a control never makes the picture jump. Where the line starts depends on the frame: in a centred frame at Scale 100 from about Distortion −25, with Fit from about −14, at Scale 50 already from about −6. The card names the stretched part whenever there is one.
- Edges. The fringe channels repeat the border pixel, so no coloured line runs along the frame. Cut-outs in the source keep their transparency.
- Saved projects. Projects keep their values. Two bug fixes change how some of them look. With Fit entire photo the fit alone sets the size (a Scale below the fitted size, whose row was hidden, used to shrink the picture further). And strong barrel removal no longer folds: where the lens model would turn back, the picture continues in a straight, even stretch. For a centred frame at Scale 100 this starts at about Distortion −25, a little before the old fold at about −33, so between about −29 and −33 the outer ring is now stretched evenly by up to about 2 % of the radius (about 25 px in a 1080p corner) instead of being straightened; beyond the old fold the ring is now filled instead of transparent. The card names the stretched part from half a percent on. An AI Edge Fill made on a setting that changed that much is marked as made before the update: generate it again. A fill task that was already running finishes as it started.
- Corrections are saved with the effect and applied in the export.
- More: Effect system: Lens Correction · Guided Perspective · AI Edge Fill.