
Vibrance
A gentle saturation that strengthens pale colours a lot and strong colours and skin only a little. Good for scenes with people: the colour comes alive, the faces stay natural.
Group: Color & Tone · How to add an effect
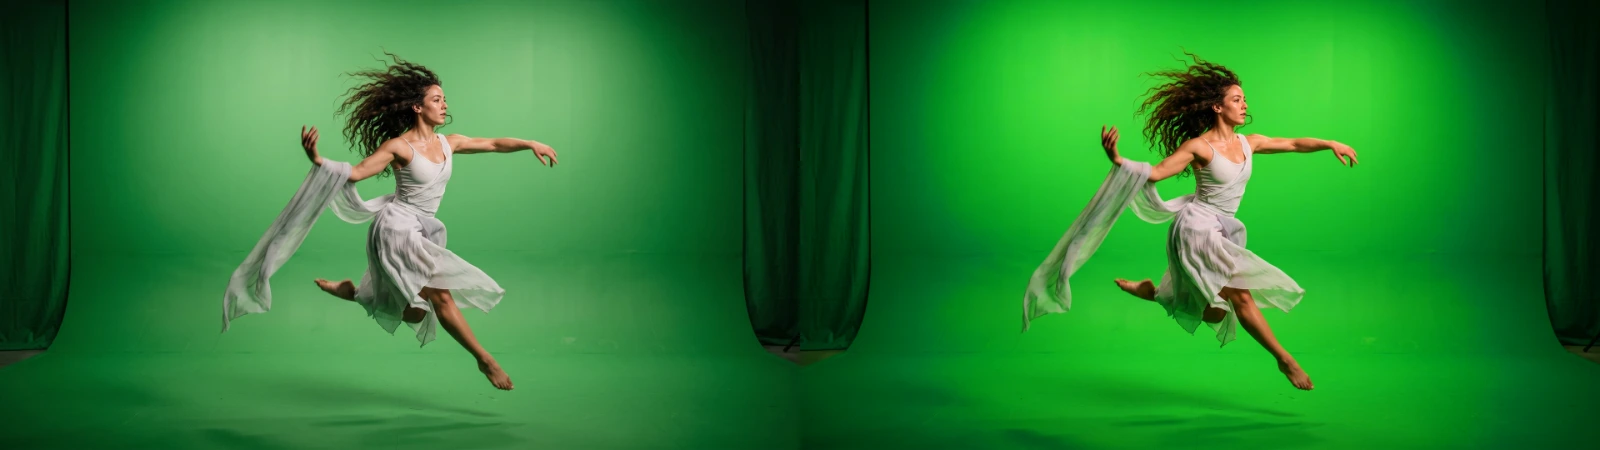
Use it for: livelier colour on people · reviving pale, washed-out shots · a quiet, muted look that keeps skin alive (below 0).
- Amount – up for livelier colour, down for a muted look; skin moves least either way.
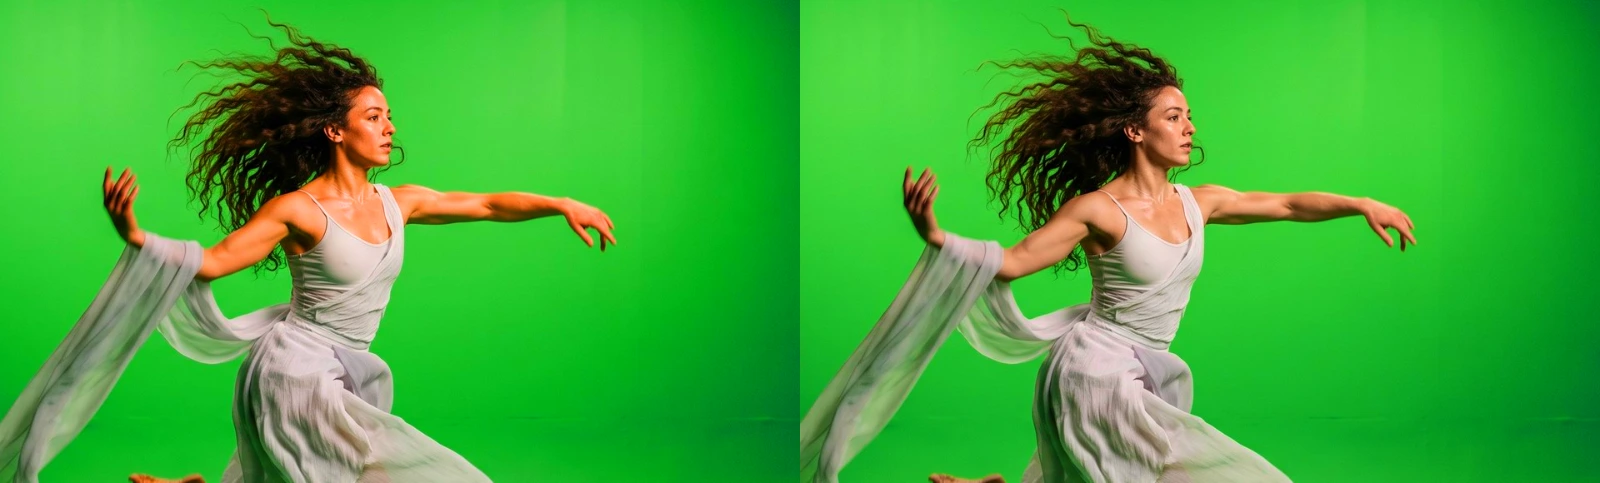
Tip: for a close-up of a face, Vibrance is the safer push. For the same push on the background, Saturation turns skin orange, Vibrance warms it only a little. Drag the slider across her face:
Presets
Section titled “Presets”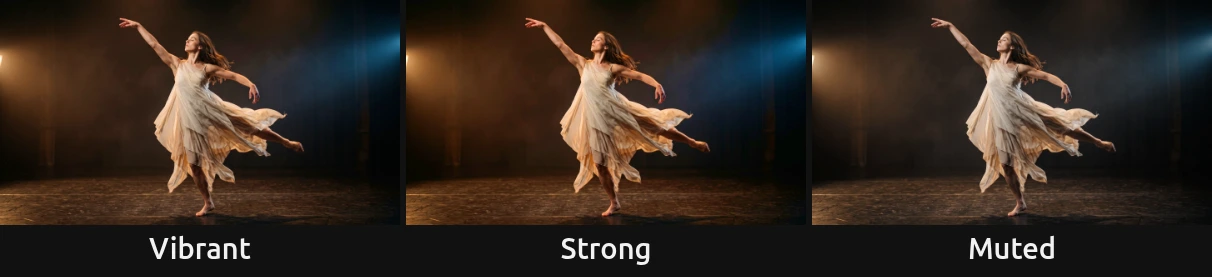
Pick one in the Preset row of the effect card. It sets Amount in one undo step, and the row then shows its name until you change the value. A keyframed Amount keeps its keyframes, and the card says so.
Vibrant – a clear push (Amount 1): the coloured light and the haze around a performer gain colour, while faces stay as they were. A good first step for a dull recording.
Strong – the top of the slider (Amount 2). Pale colours bloom, such as the blue side light and the warm haze; skin moves only a little. Pale warm surfaces, like light wood or a cream wall, count as skin and gain less too. On a scene without people, Strong looks much like Saturation at 1.8.
Muted – pale colours fade toward grey (Amount −0.6), strong colours and skin keep most of theirs: a quiet, subdued look that still has life in the faces. For a cool look, add Temperature.
Controls
Section titled “Controls”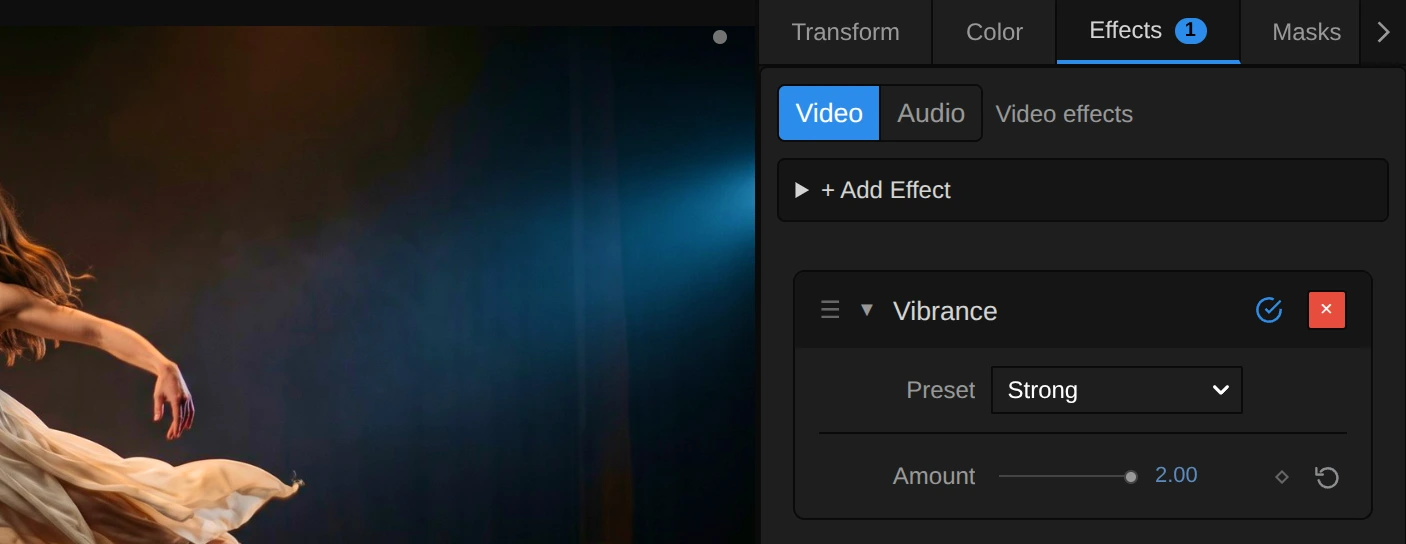
Preset – one of the three starting points above; it sets Amount.
Amount – how much livelier or quieter the colour gets. 0 leaves the picture as it is. Above 0 every colour grows stronger by how pale it is: a washed-out sky or a pale green screen gains a lot, a colour that is already strong gains little, and lit skin tones are spared most of it. Below 0 it works the other way round: pale colours fade toward grey first, and at −1 only the strongest colours keep much of theirs. Like Saturation, every colour stops at the strongest version the screen can show, so nothing clips and the brightness stays. Warm surfaces in bright light count as skin too: on a stage lit in orange, like the one in the loop, the warm haze is spared like skin, and Vibrance acts much like a mild Saturation. Use Saturation there for a stronger push. 1 is a clear push, 2 a strong one. −1 to 2, default 0. In the number field you can type up to 4 for an even stronger push; beyond that, and below −1, the picture uses the limit and the inspector says so.
Node setup
Section titled “Node setup”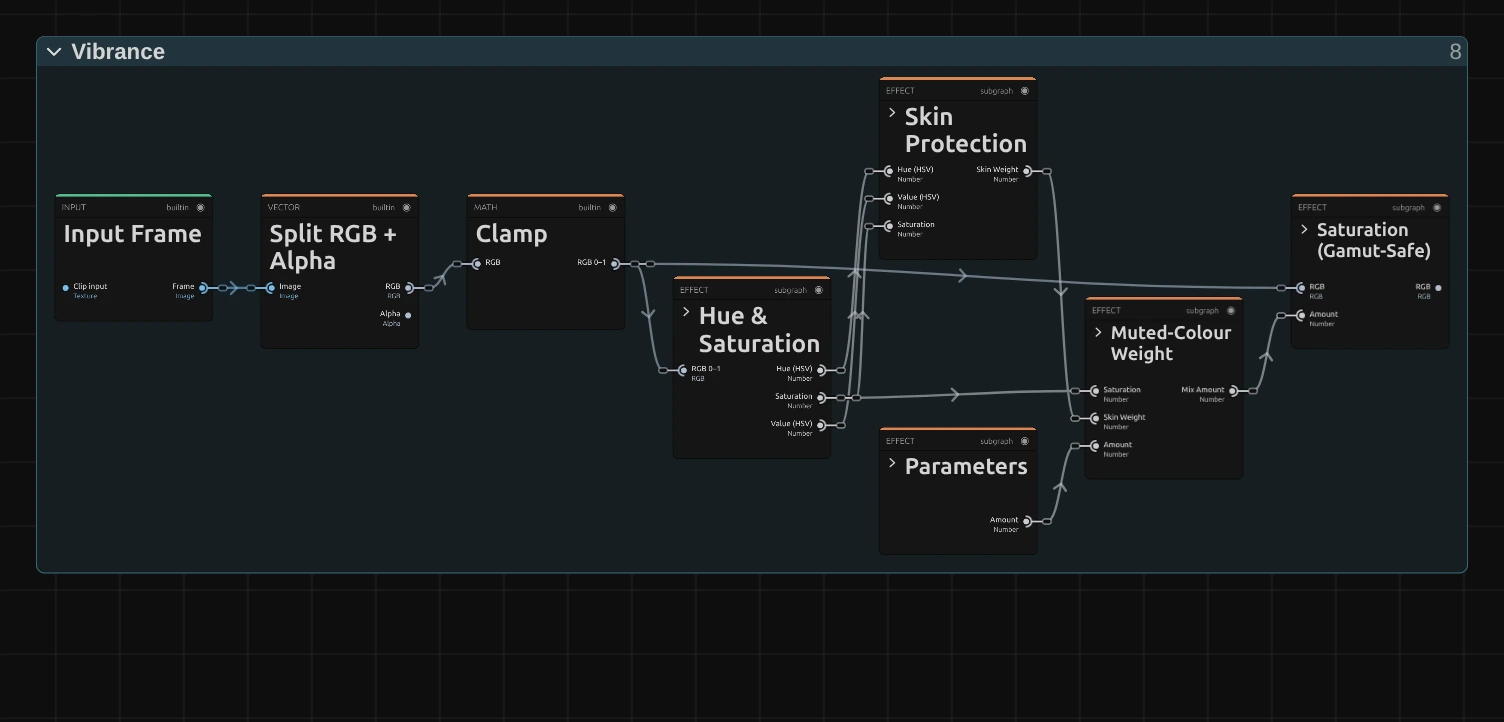
Vibrance is Saturation with a different strength for every pixel. Parameters keeps Amount within its range. Hue & Saturation measures each colour, Skin Protection finds lit skin tones, and Muted-Colour Weight turns both and the Amount into the Mix Amount of that pixel: more for pale colours, less for strong ones and for skin. Saturation (Gamut-Safe) is the same block as in Saturation and does the mixing. Clamp keeps the picture between 0 and 1 first, and Combine RGB + Alpha (after the block, not shown) puts the transparency back untouched. Click a folder’s header to open it; the sections below show what is inside.
Parameters
Section titled “Parameters”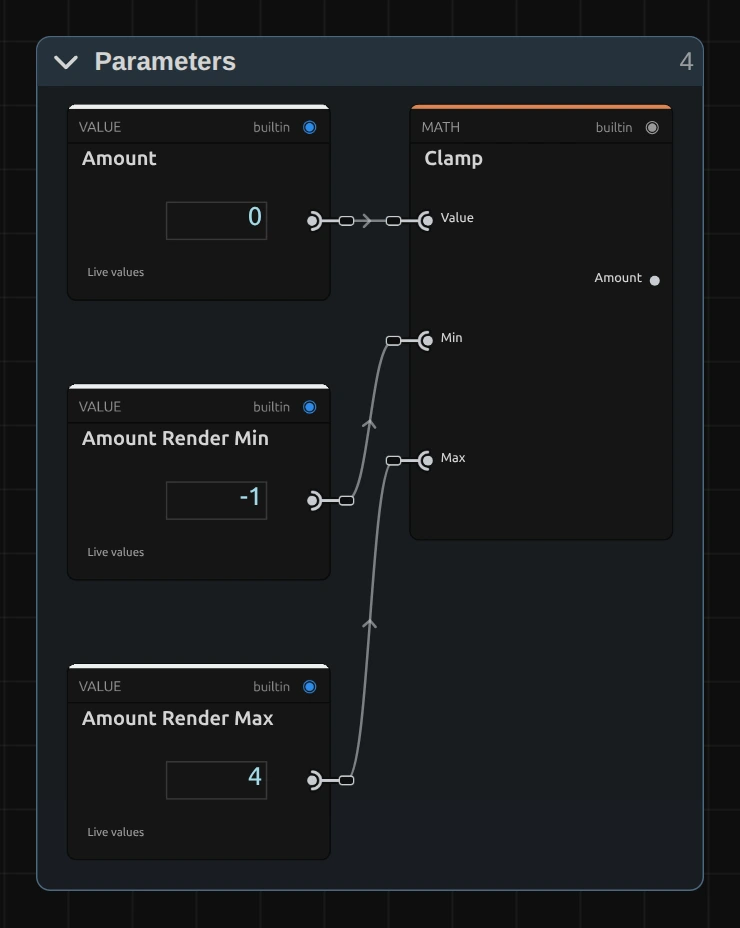
Clamp – keeps Amount between −1 and 4, the values in Amount Render Min and Amount Render Max. At −1 the palest colours are already almost grey, and above 4 even strong colours have reached the edge of the screen. A keyframe, a node or the AI agent may send more; the graph then uses the limit, and the card and the tool result say so.
Hue & Saturation
Section titled “Hue & Saturation”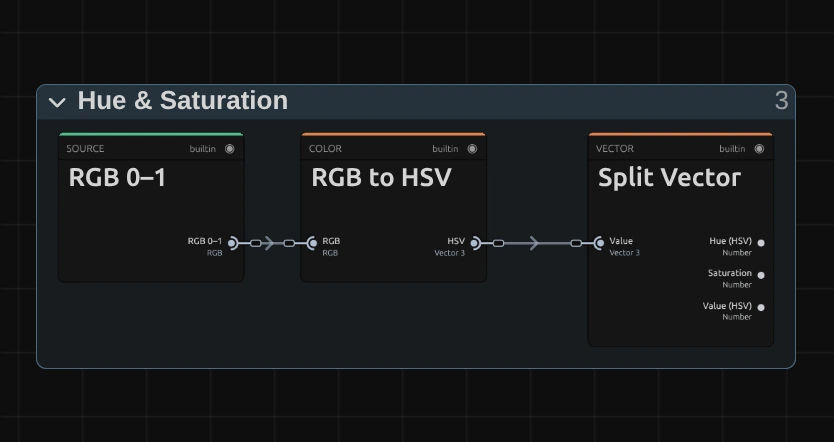
RGB to HSV – describes each colour as its hue (where on the colour wheel, 0 to 1), its saturation (how far from grey, 0 to 1) and its value (the brightness of its strongest channel).
Split Vector – hands the three numbers out on their own: Saturation goes to the weight, all three go to the skin test.
Muted-Colour Weight
Section titled “Muted-Colour Weight”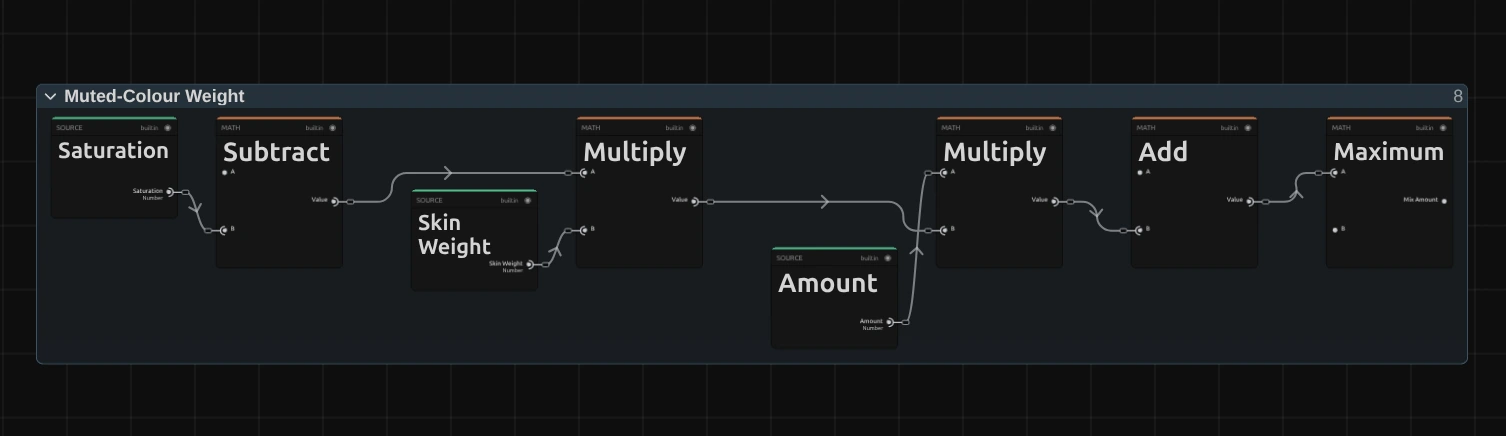
Subtract – 1 minus the saturation: how pale the colour is. A grey pixel gets 1, a pure colour 0.
Multiply – the paleness times the Skin Weight from Skin Protection, so skin tones get only part of it. The Multiply after it scales that weight by Amount, and Add puts 1 on top, because 1 is the mix that leaves the colour as it is.
Maximum – keeps the result at 0 or above, so a mix never turns a colour into its opposite. This is the Mix Amount that Saturation (Gamut-Safe) reads.
Remix: to treat skin like every other colour, connect a Value of 1 to input B of the Multiply (2), in place of Skin Weight.
Skin Protection: the hue test
Section titled “Skin Protection: the hue test”Skin Protection asks two questions: is the hue that of skin, and is the pixel lit like skin? The answer is the Skin Weight, 1 for every colour that is not skin and down to 0.3 for clear skin. This section shows the first question, the next one the second.
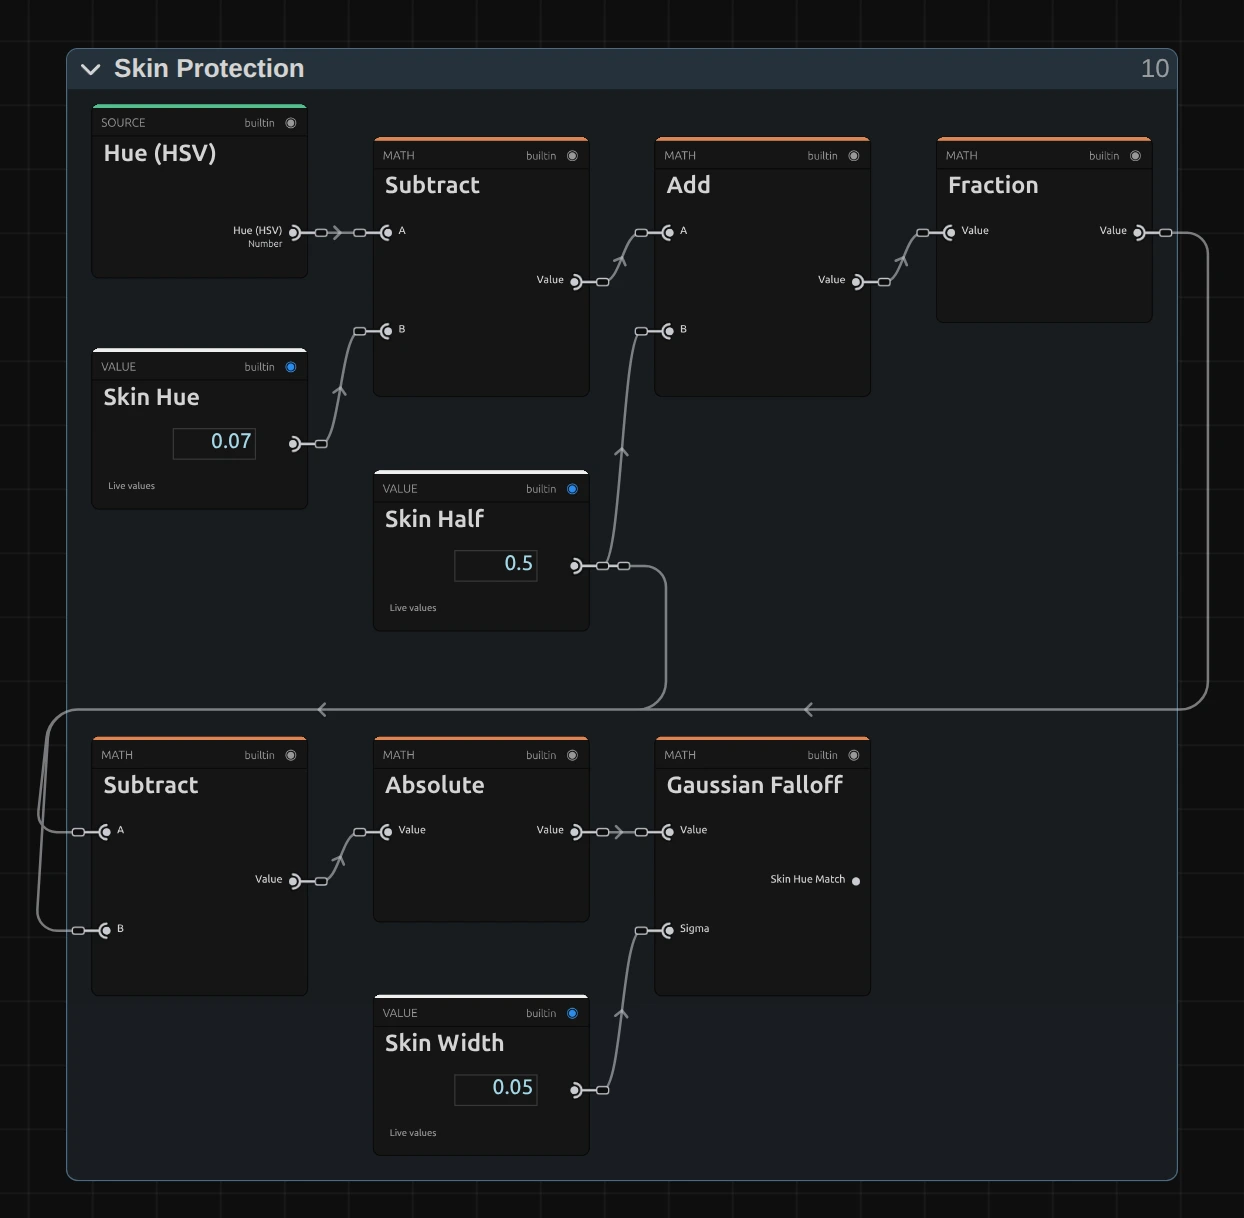
Subtract – the hue minus Skin Hue, 0.07 of the colour wheel (about 25°, the orange of skin in light). Add puts Skin Half (0.5) on top.
Fraction – keeps only the part after the decimal point. The colour wheel is a circle, so a red at 0.98 is close to the skin hue too; this wrap finds the short way round. A second Subtract below takes the 0.5 off again, and Absolute turns the result into a plain distance from the skin hue, 0 to 0.5.
Gaussian Falloff – turns the distance into a match: 1 right on the skin hue, falling off smoothly over Skin Width (0.05, about 18°) to nearly 0. This is the Skin Hue Match.
Skin Protection: the light test
Section titled “Skin Protection: the light test”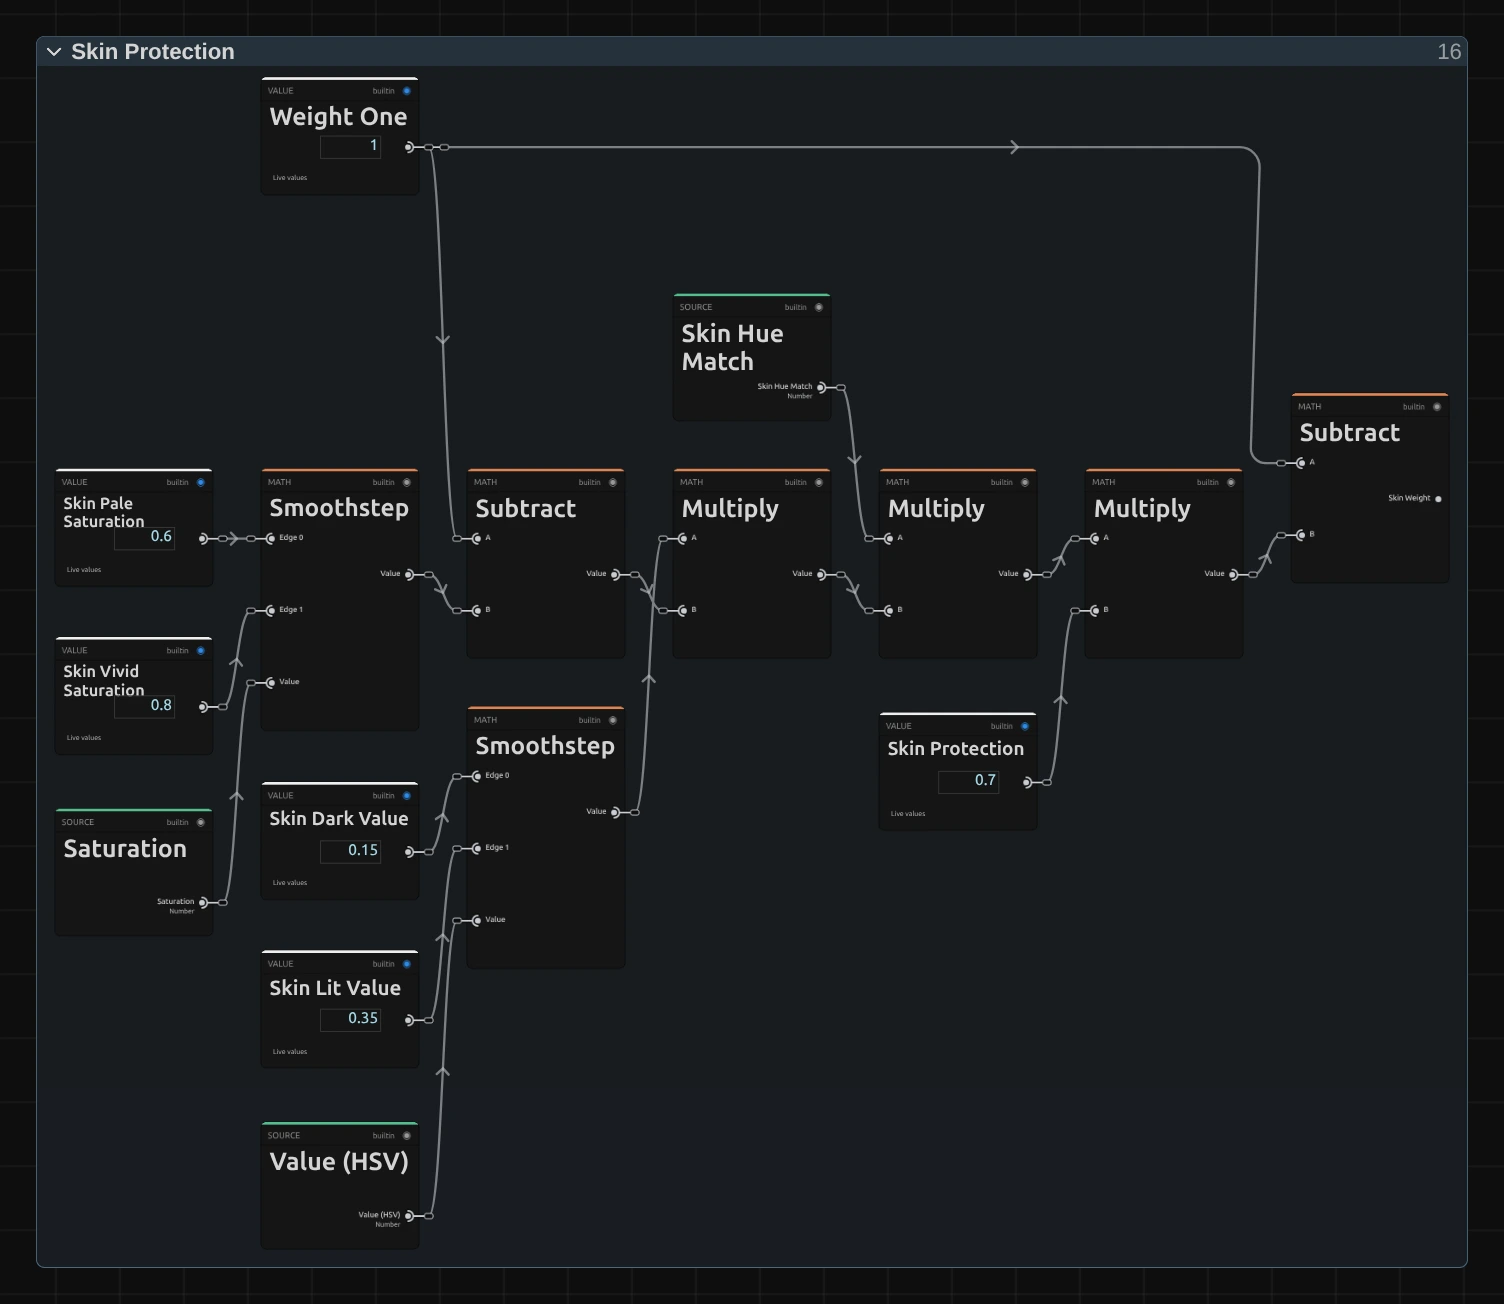
Smoothstep – there are two. The upper one rises smoothly from 0 to 1 as the saturation goes from Skin Pale Saturation (0.6) to Skin Vivid Saturation (0.8); the Subtract after it turns that round: 1 for colours that could be skin, 0 for strong orange light, which then gets the full push. The lower one rises from 0 to 1 as the value goes from Skin Dark Value (0.15) to Skin Lit Value (0.35): a dark, warm stage floor has the hue of skin but is not lit like it, so it is not protected.
Multiply – three in a row. The first joins both tests: lit and not too vivid. The second joins that with the Skin Hue Match from the hue test. The third scales it by the protection strength, the value card at 0.7 (its card shares the folder’s name): clear skin is spared 70 % of the push.
Subtract – 1 minus that: the Skin Weight, which the Muted-Colour Weight multiplies with the paleness.
Remix: set the 0.7 strength card to 1 to leave skin completely untouched, or move Skin Hue to 0.6 to spare a blue instead, say the sky of a scene.
Saturation (Gamut-Safe)
Section titled “Saturation (Gamut-Safe)”The same block as in Saturation, with the Mix Amount in place of the Amount: it mixes from grey to colour and stops every pixel at the strongest version the screen can show. The block is also in right-click → Reusable Nodes.
Technical details
Section titled “Technical details”- Formula. Mix Amount
k = max(0, 1 + Amount · (1 − S) · w)withSthe HSV saturation andwthe Skin Weight, theny = L + (x − L) · min(k, limit)as in Saturation (L: Rec.709 brightness). At Amount 1 a pale sky of (0.55, 0.7, 0.9) getsk= 1.61, stops at its limit 1.46 as (0.49, 0.71, 1.0); a lit skin tone of (0.85, 0.6, 0.48) gets only 1.19 and becomes (0.89, 0.59, 0.45). - Skin. A bell curve around hue 0.07 (about 25°), width 0.05, sparing up to 70 %. The protection fades in over HSV value 0.15–0.35 and out over saturation 0.6–0.8, so dark warm floors and strong orange light get the full Amount.
- Range. The slider covers −1 to 2; typed values, keyframes and nodes render −1 to 4. Beyond that the graph uses the limit, and the inspector and the tool result say so.
- Colour. Brightness and hue stay; pure black, white and grey stay as they are at every value.
- Transparency. Only the colour is changed; the transparency passes through untouched.
- What all colour effects share (8-bit range, saved projects, adjustment layers): Color & Tone. Formulas: Effect system; blocks: Node Catalog · Styles and presets.