
Gaussian Blur
A smooth, even softening, like a lens out of focus. The standard choice for backgrounds, focus pulls and anything that should simply look soft.
Group: Blur & Sharpen · How to add an effect

Use it for: a soft background behind titles · a focus pull on a cue · calming a busy projection.
- Radius – how soft the picture gets.
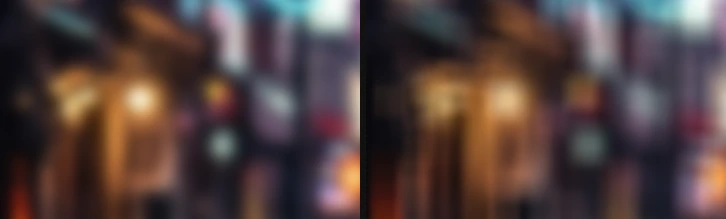
Tip: keyframe Radius from 0 up to 10 for a smooth focus pull. For a graphic, square softness use Box Blur; the difference shows most on small lights: Which one?
Presets
Section titled “Presets”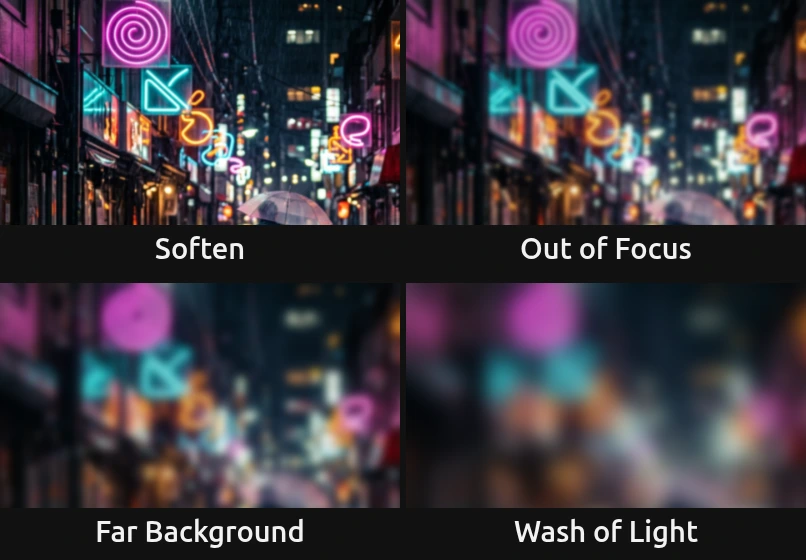
Pick one in the Preset row of the effect card. It sets Radius in one undo step, and the row shows its name until you change something. A Radius with keyframes keeps them, and the card says so.
Soften – Radius 3: takes the digital hardness off sharp footage, graphics or text, without looking blurred. Good on a second layer that should sit behind the first.
Out of Focus – Radius 10, the default: clearly out of focus, but shapes and faces stay recognisable. A background behind a title or a projection that should not compete with the stage.
Far Background – Radius 22: only the large forms and the lights are left, like a background far behind a sharp foreground.
Wash of Light – Radius 50: every light melts into a soft, round glow of colour. A quiet backdrop for text or the end point of a scene change.
Controls
Section titled “Controls”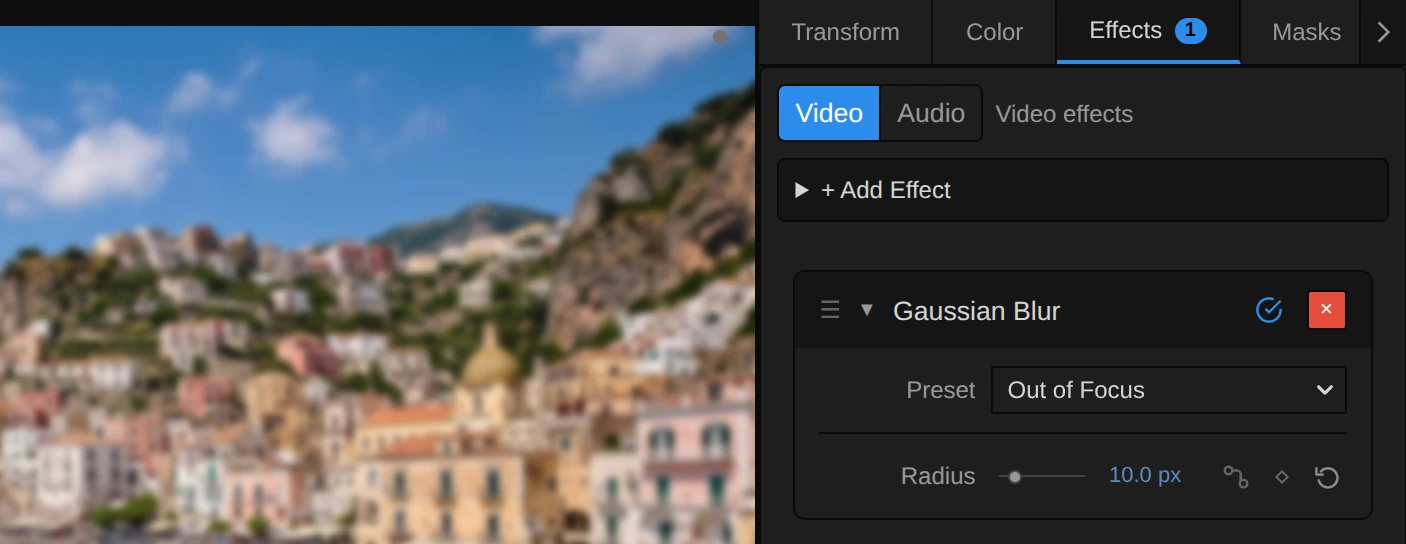
Preset – a starting point for Radius; see Presets.
Radius – how soft the picture gets. Every pixel becomes an average of its neighbours, the nearest counting most, so edges melt into each other and small lights turn into round glows, like a lens out of focus. It starts to show at about 1; 2–5 takes the edge off, 10 is clearly out of focus, around 20 only the large forms are left and 50 leaves soft patches of light and colour. It counts pixels of a 1080p picture, so a 4K export shows the same blur relative to the picture. Animated, it changes smoothly, and 0 leaves the picture untouched. 0 to 50 px, default 10 px.
Node setup
Section titled “Node setup”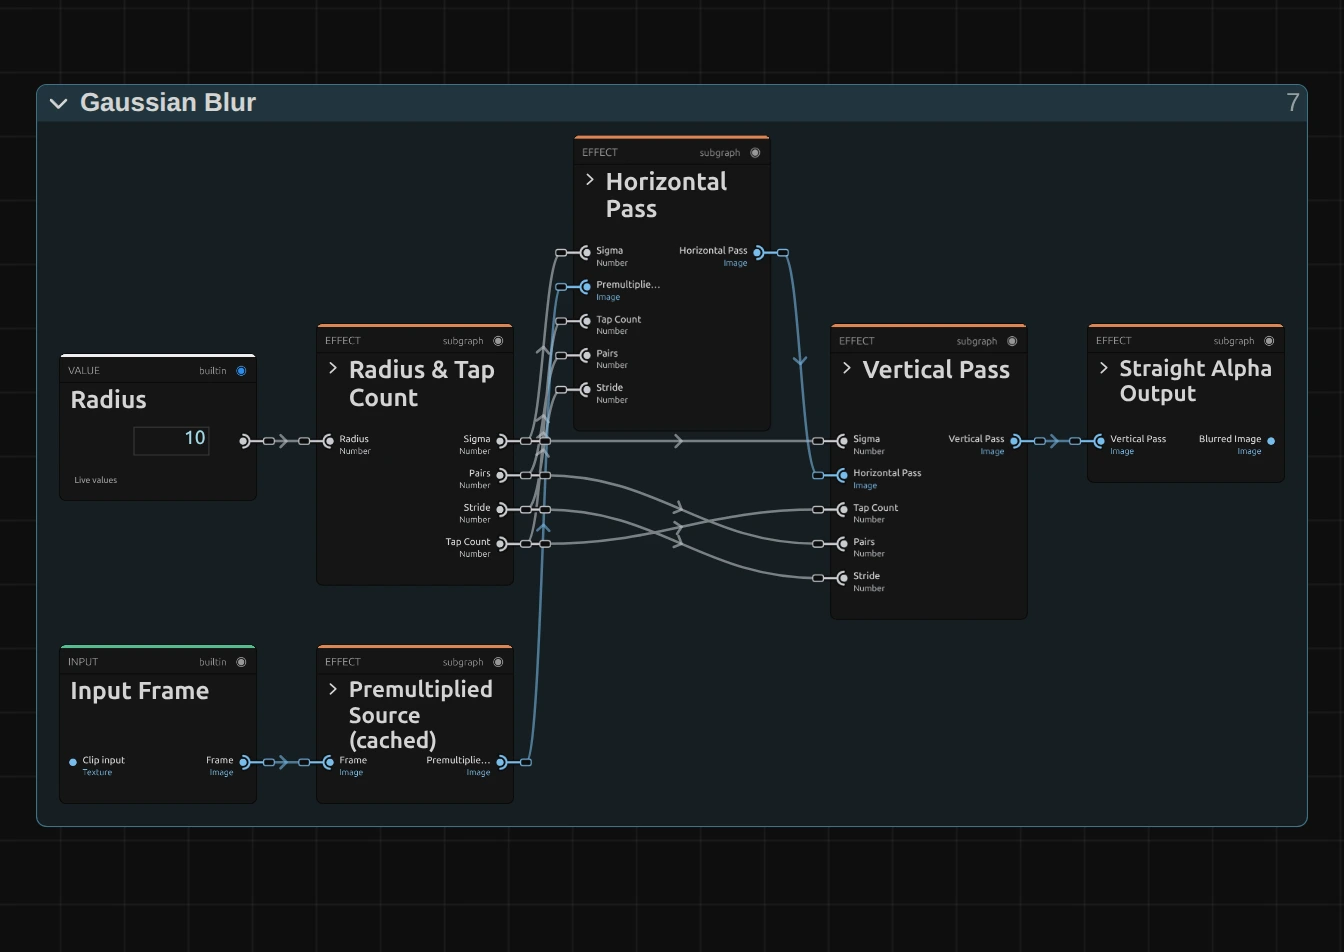
Gaussian Blur works in five stages, one folder each in the Nodes tab: Radius & Tap Count turns Radius into the width of a bell curve and the number of reads, Premultiplied Source prepares the picture so transparent edges stay clean, Horizontal Pass blurs along the rows and Vertical Pass along the columns of that result, and Straight Alpha Output turns the result back into a normal picture. A bell curve across the rows followed by one down the columns is exactly the round blur of a lens, at a fraction of the reads. Click a folder’s header to open it. Box Blur has the same stages; only the weights inside the passes differ.
Radius & Tap Count
Section titled “Radius & Tap Count”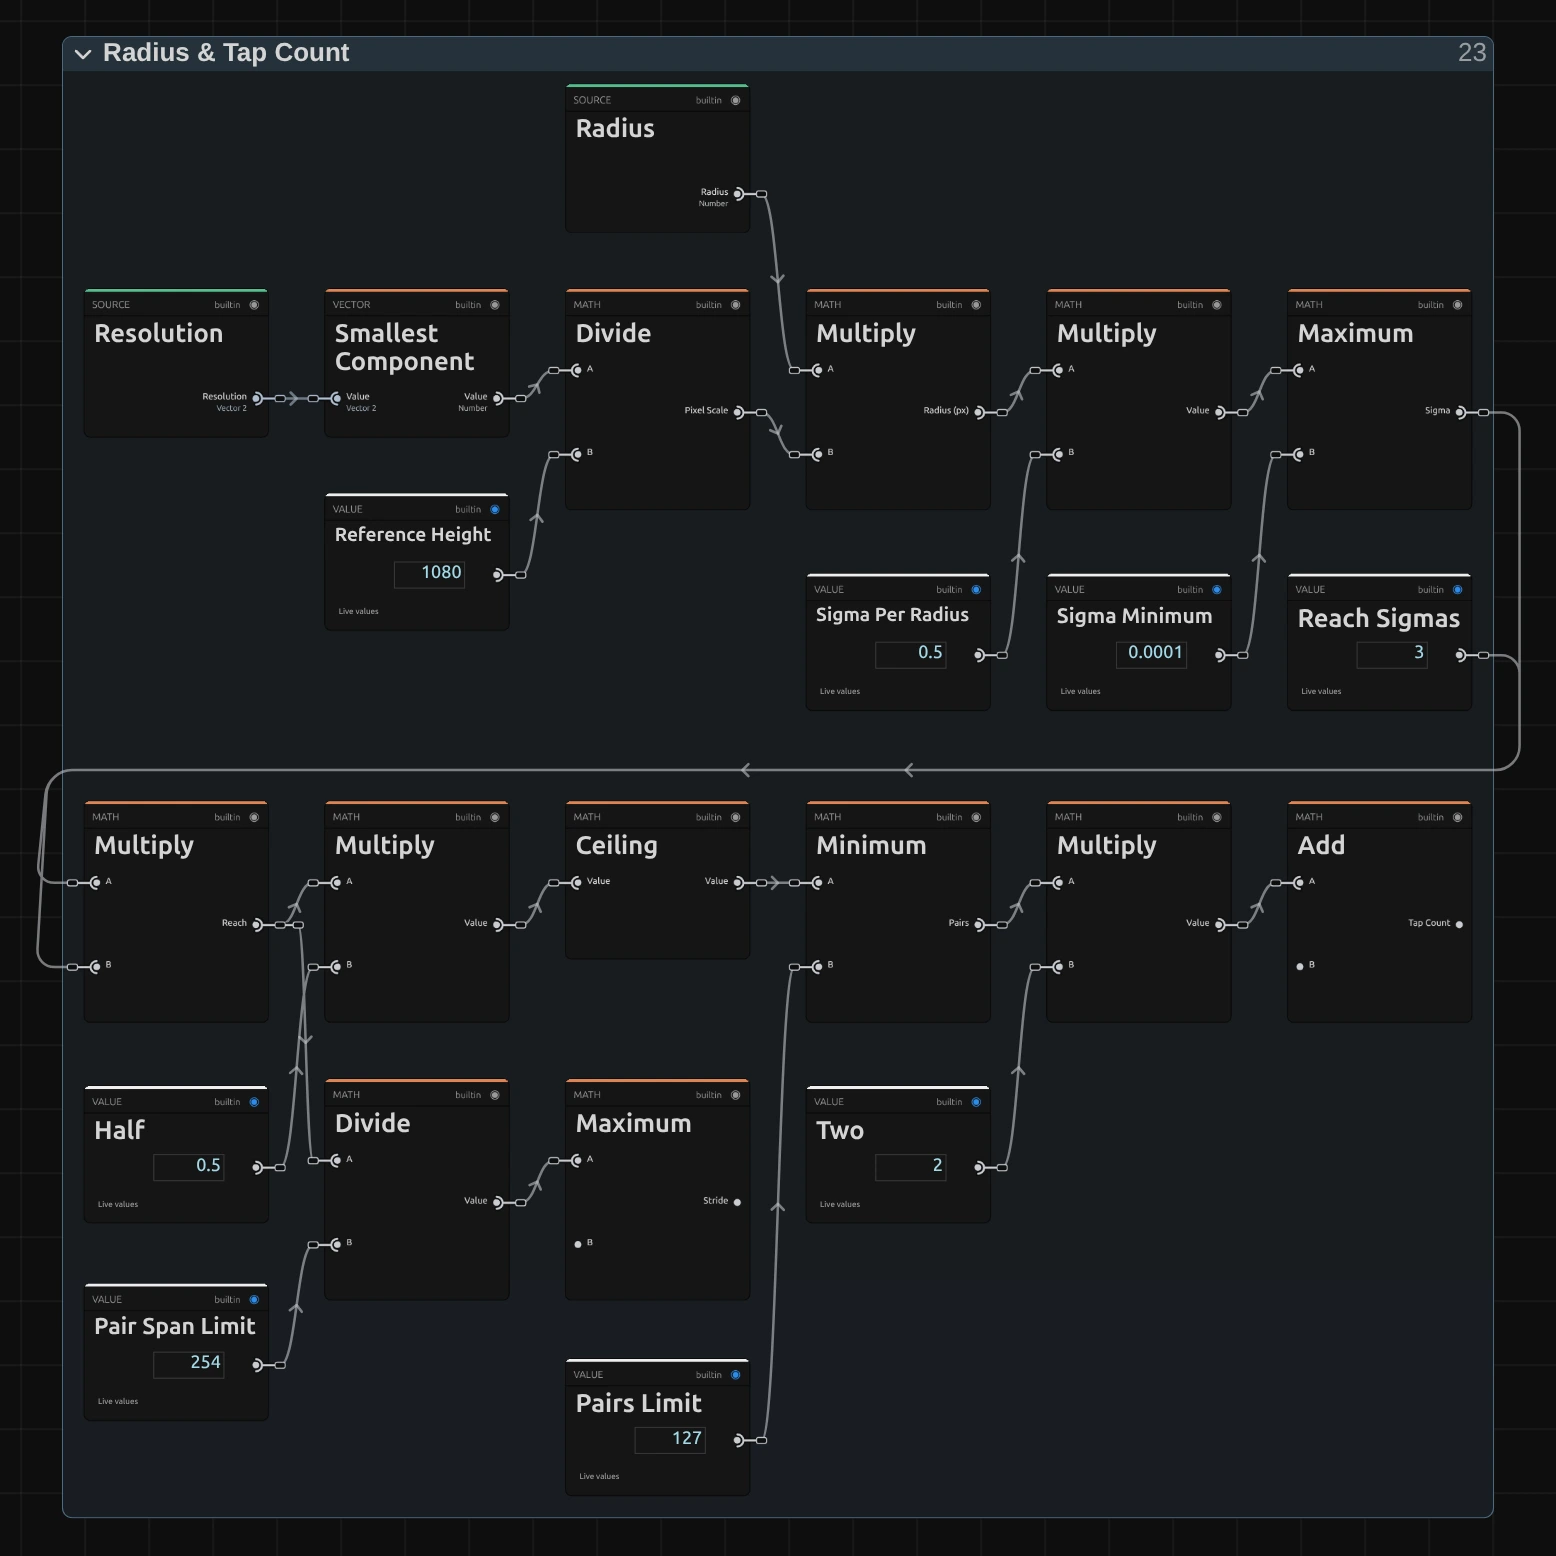
Smallest Component – the shorter side of the frame. Divided by 1080 it says how much larger or smaller this frame is than a 1080p one; the next Multiply turns Radius into pixels of this frame, so a 4K export, a portrait frame and a thumbnail show the same blur.
Maximum – the Sigma: half the radius in pixels, the width of the bell curve. It never goes below a tiny 0.0001, so Radius 0 cannot divide by zero; at that size the curve only covers the pixel itself and the picture stays exactly as it was.
Multiply – Sigma times 3: the Reach. Beyond three Sigma a neighbour counts less than 1 %, so the curve is cut there without a visible edge. At 1080p the blur therefore reaches about 1.5 × Radius pixels to each side.
Minimum – how many pairs of pixels each side reads: half the Reach, rounded up by Ceiling, but at most 127. Beside it, Divide and the lower Maximum give the stride: 1 up to a reach of 254 pixels, so every pixel is read; beyond that the reads spread out instead of cutting the curve short. Only a frame with a shorter side above about 3600 px reaches that at Radius 50.
Add – Pairs times Two plus One: the Tap Count, the pixel itself and both pixels of every pair.
Premultiplied Source
Section titled “Premultiplied Source”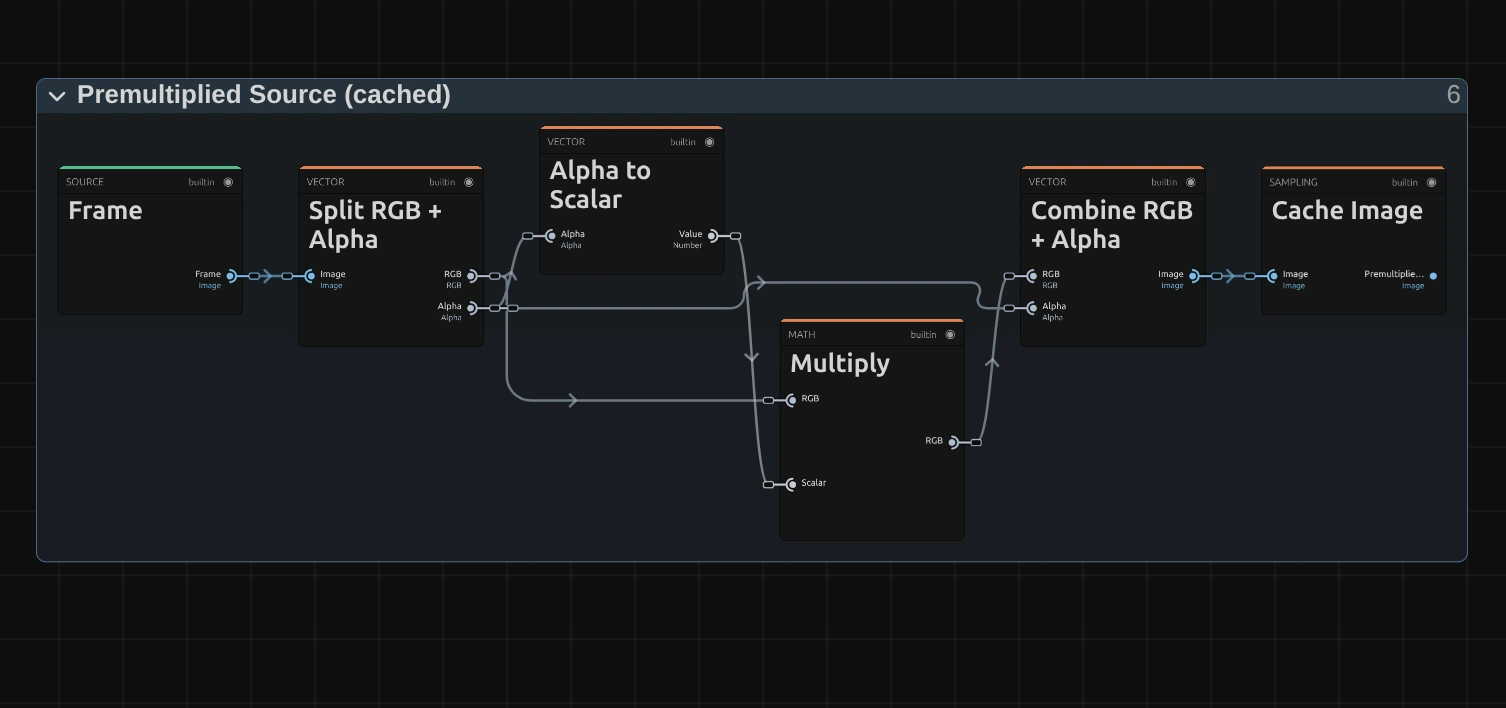
Multiply – multiplies each pixel’s colour by its alpha. A see-through pixel then adds almost nothing to the average, so the colour of its invisible part cannot leak into the blur as a dark rim around a cut-out figure or a title.
Cache Image – keeps the prepared picture in a 16-bit float texture for Horizontal Pass to read, so no precision is lost in dark areas.
Horizontal Pass
Section titled “Horizontal Pass”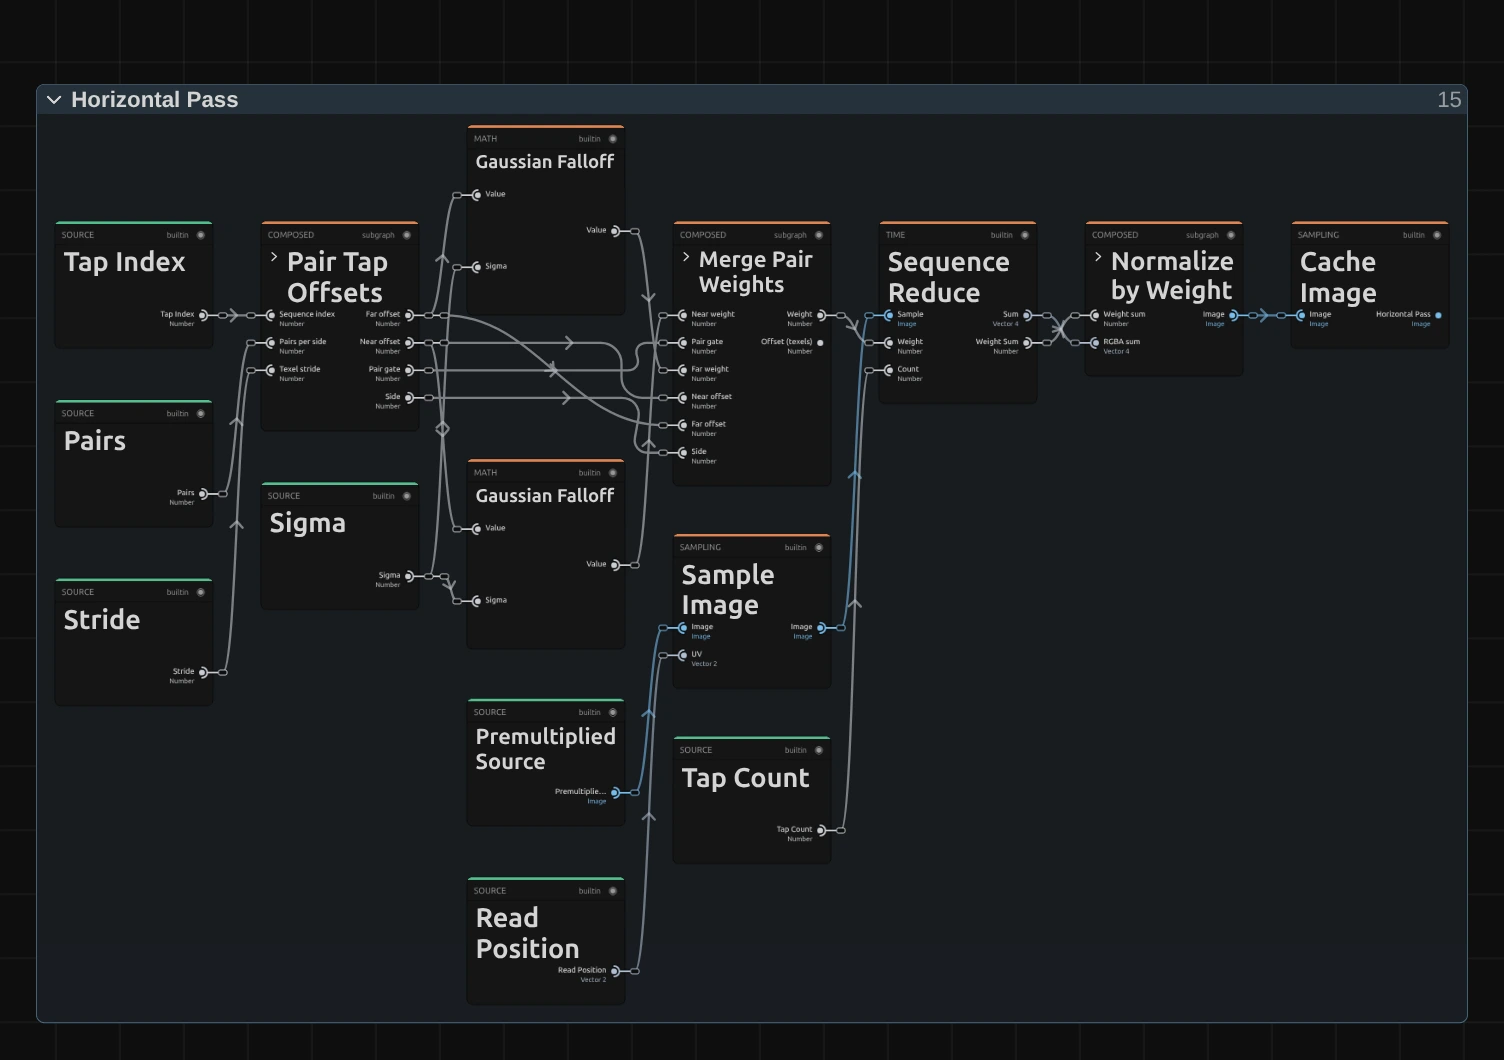
Pair Tap Offsets – lists the reads along the row: the pixel itself and, for every pair, the distance of its near and far pixel. It holds a small node setup of its own; its › opens it.
Gaussian Falloff – the bell curve itself: how much a pixel at that distance counts, 1 at the centre and fading smoothly with distance; Sigma sets how wide. There is one for the near and one for the far pixel of each pair. This is the only place where Gaussian Blur differs from Box Blur.
Merge Pair Weights – folds each pair into one read at the point between its two pixels where their weights balance. The graphics card blends the two pixels there for free, so one read covers two and the result is exact.
Sequence Reduce – reads the Premultiplied Source at every position (Sample Image) and adds up the reads, each times its weight.
Normalize by Weight – divides that sum by the sum of all weights, so the average keeps the picture’s brightness, and Cache Image keeps the blurred rows for the vertical pass.
Vertical Pass
Section titled “Vertical Pass”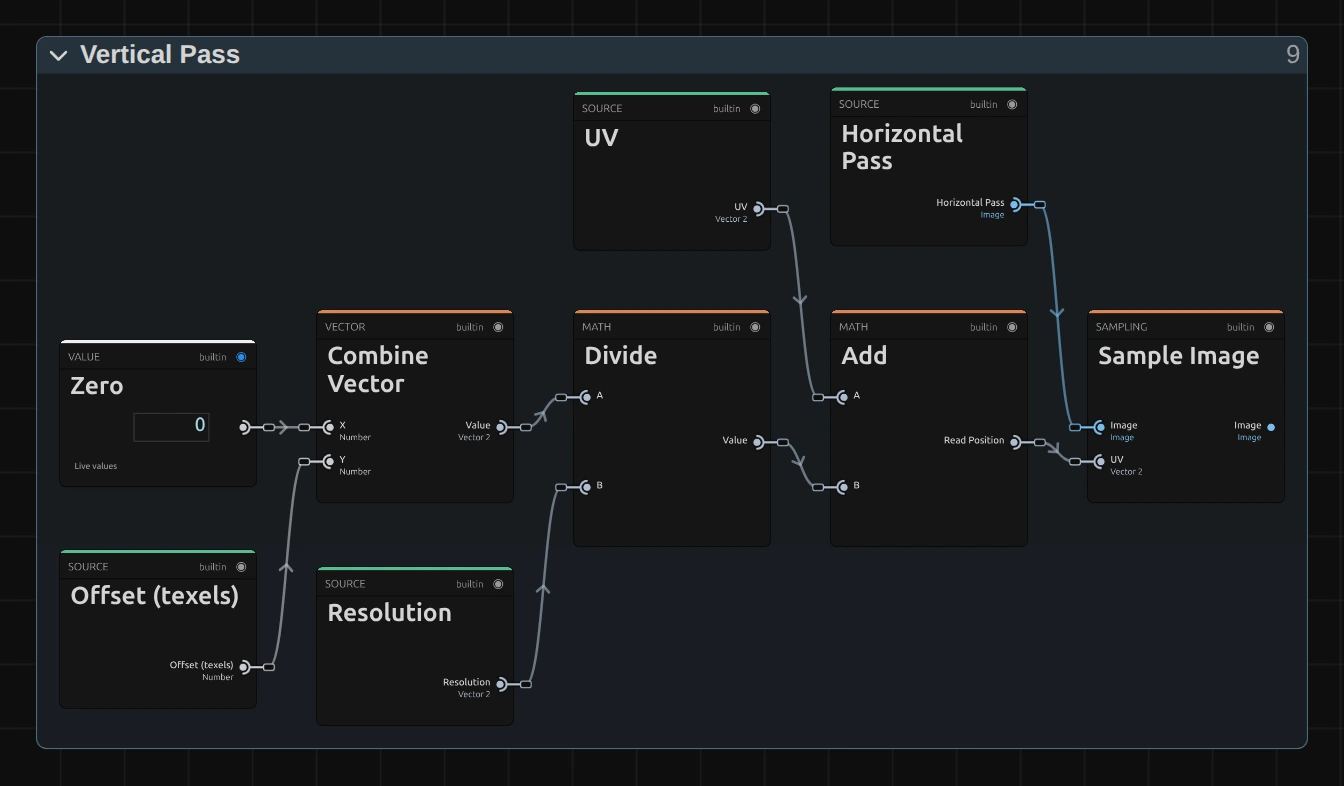
Vertical Pass holds the same recipe as Horizontal Pass, with two differences:
Combine Vector – puts the offset into the second, vertical place (the first is Zero), so the reads go up and down a column instead of along a row.
Sample Image – reads the cached result of Horizontal Pass instead of the source. A bell curve along the rows followed by one down the columns gives a perfectly round blur.
Remix: for a blur that stretches sideways, like a lens with a horizontal smear, open Vertical Pass, Multiply Sigma by a Value of 0.3 and plug the result into the Sigma input of both Gaussian Falloff nodes there. The rows stay as soft as before, the columns get sharper.
Straight Alpha Output
Section titled “Straight Alpha Output”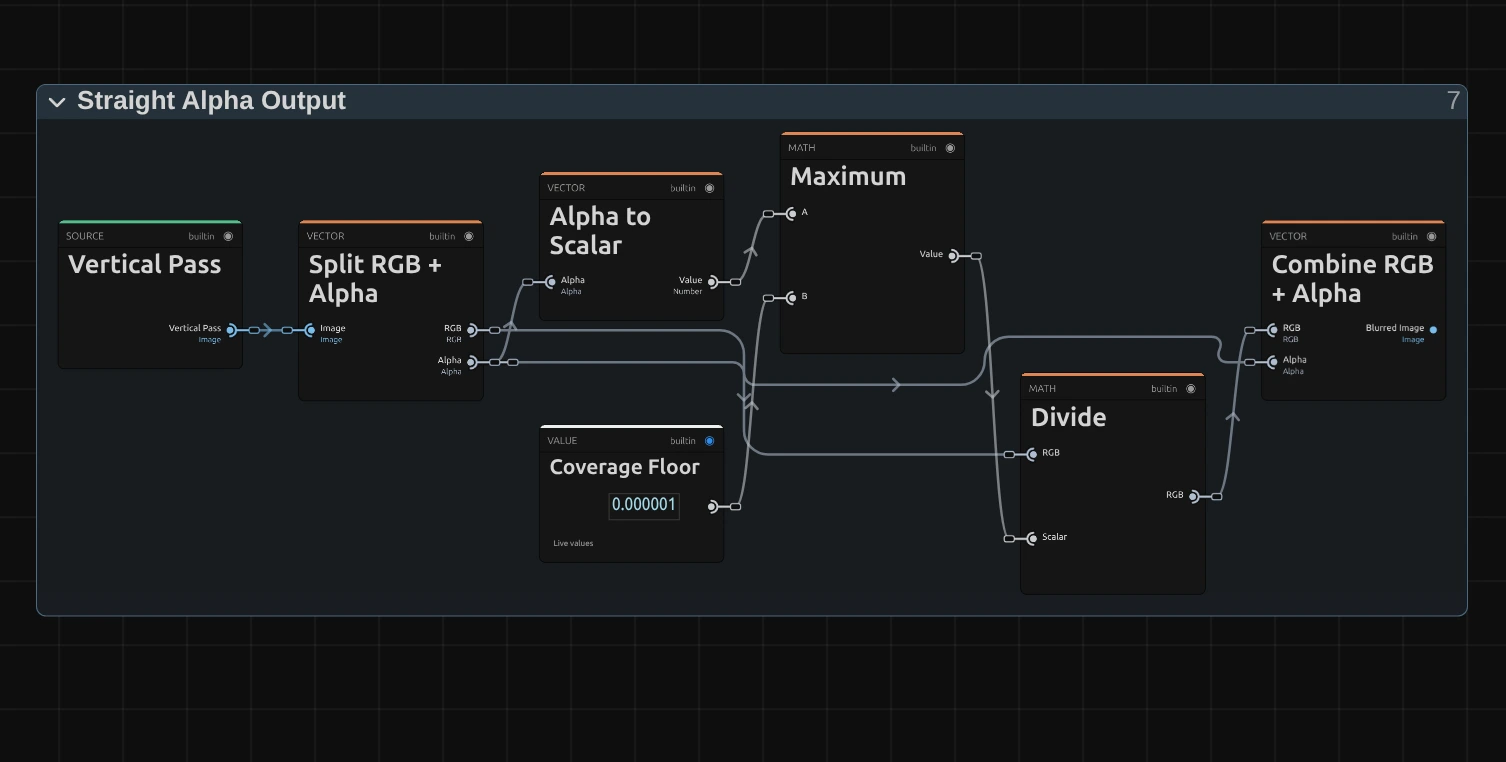
Maximum – the blurred alpha, but never below the Coverage Floor, a tiny 0.000001. Fully transparent pixels then stay black and transparent instead of turning into errors.
Divide – divides the blurred colour by the blurred alpha: the reverse of the Multiply in Premultiplied Source, so half-transparent edges get their real colour back.
Combine RGB + Alpha – joins colour and alpha into the finished picture that leaves the effect.
Technical details
Section titled “Technical details”- Size. Radius counts pixels of a frame whose shorter side is 1080: preview quality, a 4K export, a portrait frame and the thumbnails all show the same blur relative to the picture.
- Kernel. A bell curve with Sigma = Radius / 2, cut at 3 Sigma. A horizontal pass into a 16-bit float cache, then a vertical pass: about 1.5 × Radius + 1 reads per pass at 1080p, two pixels per read. Up to 127 reads per side; beyond that (Radius 50 on a frame whose shorter side is above about 3600 px) the reads spread out, and the card and the tool result say so.
- Small radii. Below about Radius 0.7 the curve is so narrow that the change stays under one step of an 8-bit picture; from 1 on it shows.
- Edges. At the frame edge the outermost pixels repeat, so a large Radius does not darken the border. Transparent edges fade without a dark rim, and the preview and the export match.
- Zero. An unedited Gaussian Blur at Radius 0 is skipped, so the picture passes through exactly.
- Software preview. Where the editor falls back to its software preview, Gaussian Blur uses a canvas blur of the same width, close to the GPU preview and the export.
- Saved projects. They render with this kernel. Compared with the kernel of versions before the blur rebuild, small radii blur a little more and large radii about 20 % less at the same Radius; the old Samples value is kept in the project but no longer changes anything. A Gaussian Blur whose node setup you edited keeps its own recipe.
- More: Blur & Sharpen notes · Editable blur kernels · Node Catalog · Styles and presets.