
Time Stack
Shows delayed copies of a moving video clip at once, like a long-exposure photo of a dance. One performer leaves a trail, a smear or a chorus of herself.
Group: Keying & Time · How to add an effect
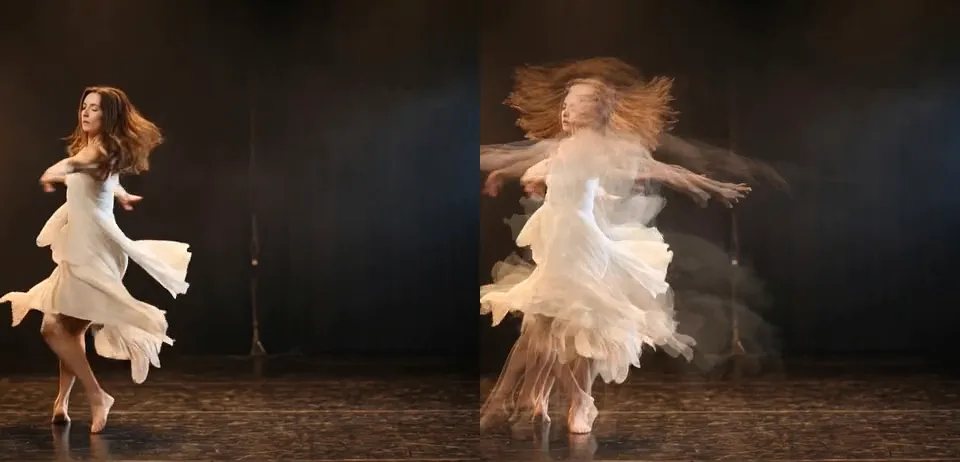
Use it for: echoes of a dancer’s movement · stroboscopic photographs in motion · one performer turned into a chorus.
- Instances – how many copies.
- Time offset – the time between them.
- Decay – how much fainter each older copy gets.
- Blend mode – how the copies combine.
Tip: the older copies come from the original video, before the effects above Time Stack. Put colour correction and other shared effects after Time Stack, so every copy gets them.
Presets
Section titled “Presets”Pick one in the Preset row of the effect card. It sets Instances, Time offset, Decay and Blend mode in one undo step, and the row shows its name until you change one of them. Preview size and Frame cache go back to Full and 1 GiB. A Decay with keyframes keeps them, and the card says so.
Echo Trail – twenty copies a tenth of a second apart, each a little fainter: arms, hair and dress fan out behind the movement and fade. The default; good for most dance.
Long Exposure – thirty-two copies, each 0.08 s apart, that fade only slowly: the last two and a half seconds of movement melt into one long smear, like a camera with its shutter left open.
Stroboscope – eight equally bright copies a fifth of a second apart: the movement breaks into clear separate poses, like a strobe photograph.
Chorus – five whole figures half a second apart: one performer becomes a small group that repeats her steps, the older ones a little fainter. Strongest on slow, large movements.
Afterglow – six quickly fading copies added in Screen: a short, soft glow follows the figure, while the dark stage stays dark (more or brighter copies would lift it into haze). For a dreamlike, luminous look.
Controls
Section titled “Controls”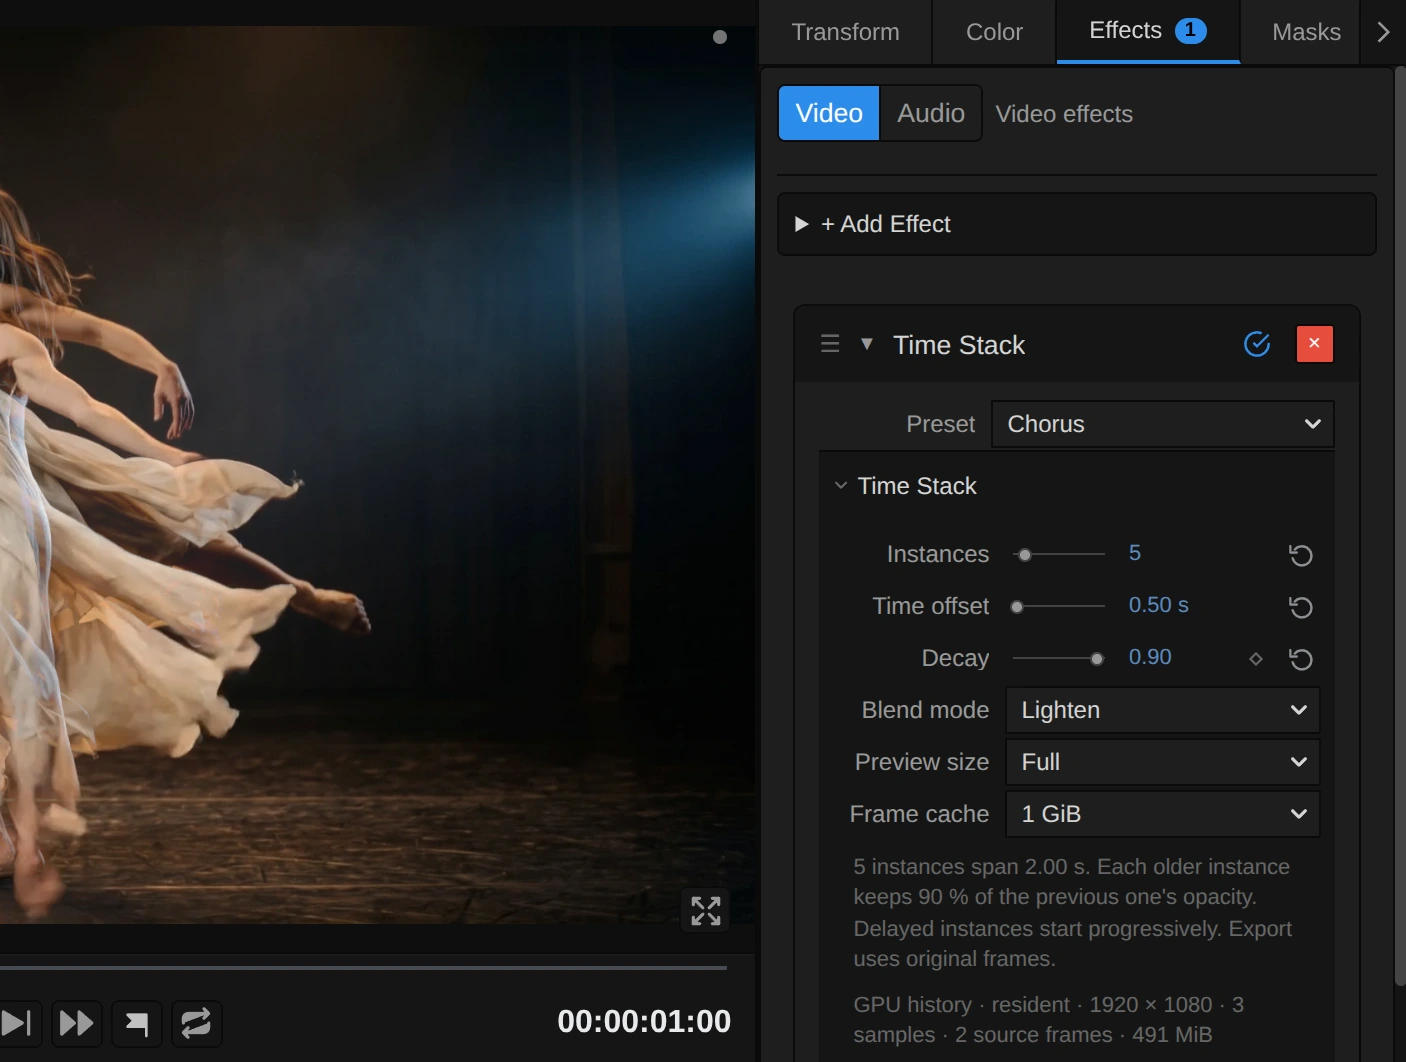
The line under the rows sums up the stack: how long it reaches back and how much each older copy keeps. When the clip is shorter than that, the card also says how many copies it can show. Instances and Time offset cannot be keyframed: together they decide which frames Time Stack keeps ready. The presets loop above shows them at work: Long Exposure uses 32 instances 0.04 s apart, Chorus 5 instances 0.5 s apart.
Instances – how many copies Time Stack layers, the current picture included. 1 shows only the current picture; 4–8 give clearly separate figures, 20 a trail, 32 with a small Time offset a smooth smear. More instances reach further back and need more frames in memory. 1 to 32, default 20.
Time offset – the time between two copies. 0.03–0.05 s melts them into a smear, 0.1–0.2 s gives separate echoes, 0.5 s and more whole figures that follow each other. The stack reaches back (Instances − 1) × Time offset: 20 copies at 0.1 s span 1.9 s. Each copy appears once the clip has played that long, so the trail builds up over the first seconds of the clip. At 0 every copy shows the same moment and the picture stays as it is. 0 to 10 s, default 0.1 s.
Decay – how much fainter each older copy gets: every copy keeps this share of the next newer one’s strength. At 0 only the current picture is left; 0.5 gives a short tail of two or three copies; at 0.8 the fifth copy keeps 41 % and the twentieth 1.4 %, a trail that fades out; at 1 all copies are equally strong, a dense crowd. It can be keyframed, for a trail that grows on a cue. 0 to 1, default 0.8.
Blend mode – how the copies combine, with the timeline’s own blend modes. Lighten keeps the brightest copy at every pixel: lit performers on a dark stage, the usual choice. Screen and Add add the light of all copies, so the figure glows and the stage brightens (Afterglow). Darken suits a dark figure in front of a bright background, Difference turns the stack dark and ghostly, and Multiply quickly sinks it into black. In Normal each older copy covers the newer ones, so the current picture ends up underneath; the card says so. Darken, Lighten, Multiply, Screen, Normal and 32 more, default Lighten: all 37 blend modes of the timeline.
Preview size – the size of the frames the preview works with. Small reads them at 960 px, which needs less memory and plays more smoothly; Full uses the original source size. The export always uses the full frames. Small (960 px), Full, default Full.
Frame cache – the graphics memory Time Stack keeps for the older frames. It changes how smoothly the effect plays, not how it looks. Raise it for long spans, 4K sources or many instances, when playback waits for frames. 640 MiB, 1 GiB, 2 GiB, 4 GiB, default 1 GiB.
Node setup
Section titled “Node setup”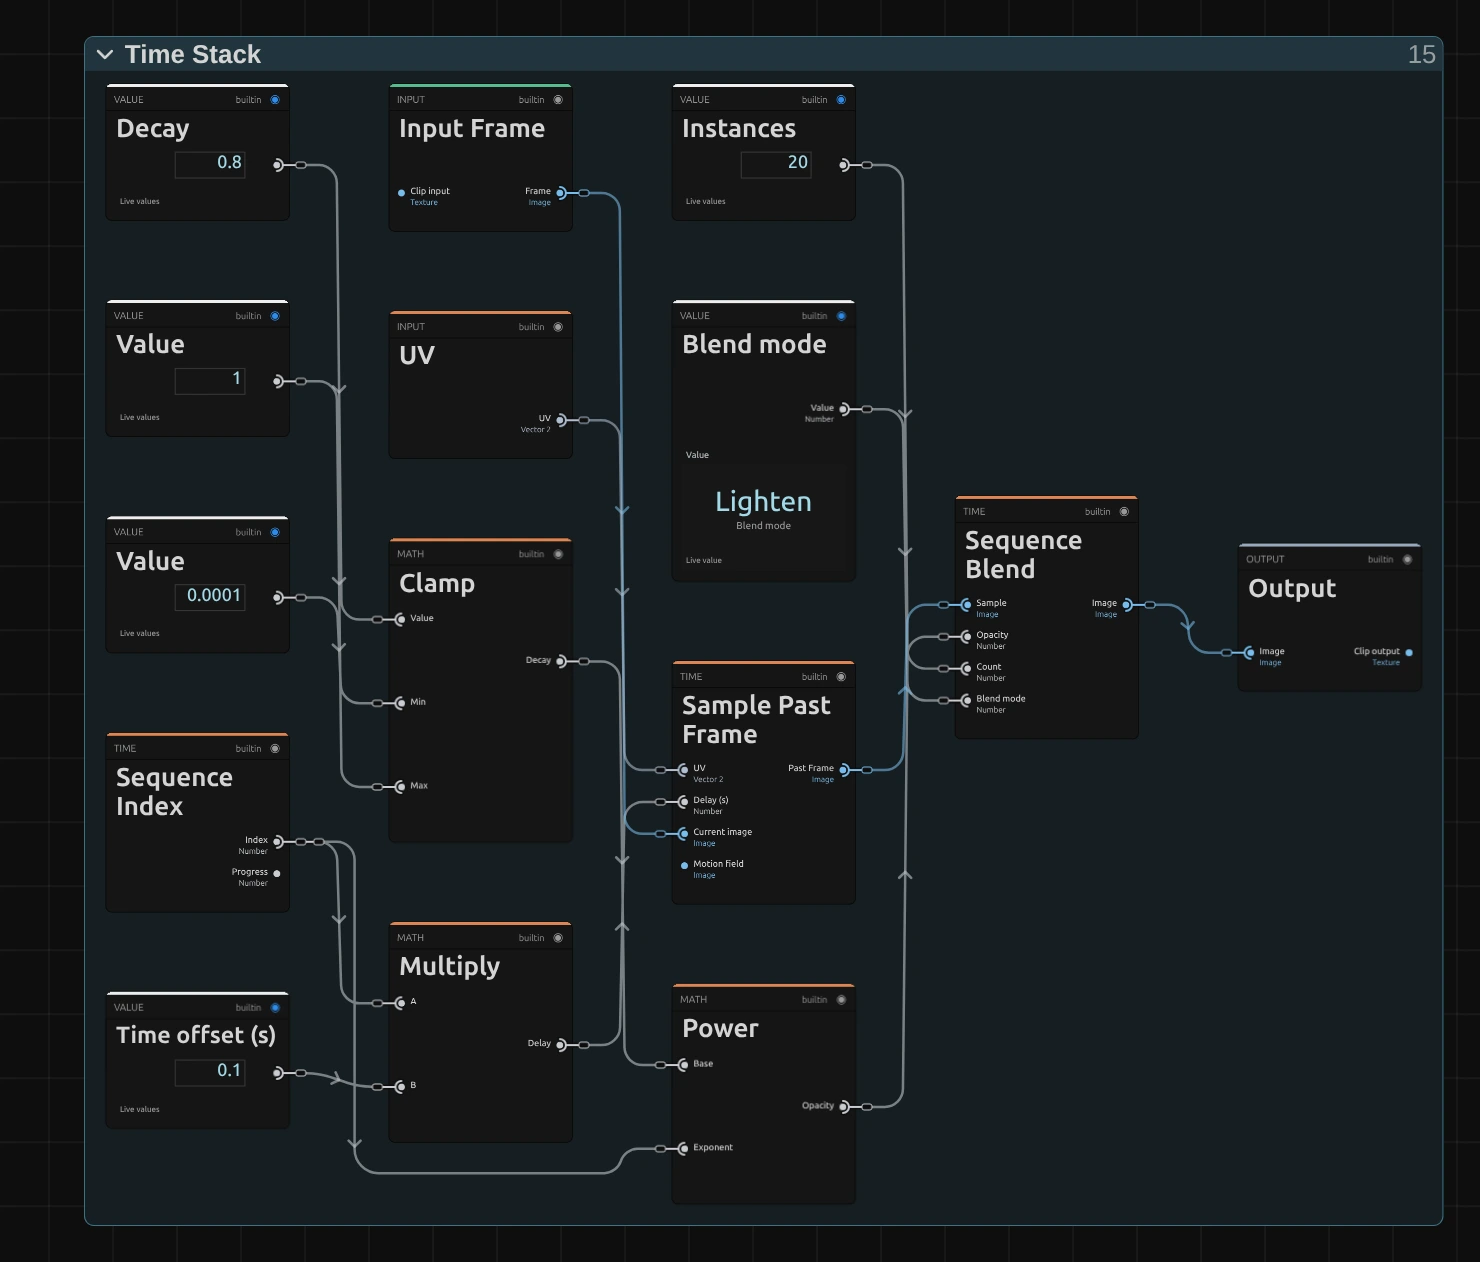
Time Stack is one small graph without stage folders: a loop over the copies that reads the past, gives each copy its strength and layers them. The GPU runs it once per pixel and goes through all copies there, instead of decoding the clip twenty times. How to open it: The node setup.
Sequence Index – counts the copies. Everything after it runs once per copy: Index is 0 for the current picture, 1 for the next older copy and so on; Progress runs from 0 to 1 along the stack.
Multiply – Index times Time offset: how many seconds back this copy reads. At the default, copy 3 shows the clip 0.3 s ago.
Sample Past Frame – reads the clip at the same spot that many seconds earlier, from the original video. For Index 0 it passes the effect’s own input, the current picture.
Power – Decay to the power of the Index: the strength of each copy, 1 for the current picture, then 0.8, 0.64 and so on at the default. The Clamp in front keeps Decay between 0.0001 and 1.
Sequence Blend – layers all copies with the Blend mode, each at its strength: the current picture first, every older copy over it. Its Count input, Instances, says how many.
Remix: for a trail that fades evenly and ends at nothing, add a Subtract (A = a Value of 1, B = Progress of Sequence Index) and plug it into the Opacity input of Sequence Blend instead of Power.
Technical details
Section titled “Technical details”- Copies. At clip time t, copy i reads t − i × Time offset and blends with opacity Decay^i. Only copies whose start time has been reached take part, so the trail builds up over the first seconds; Time offset 0 starts them all together, and one instance passes the current picture. The effect does not lengthen the clip or repeat its audio.
- Values. Decay outside 0 to 1 is used at the nearest limit (0 as 0.0001), and a Decay that is not a number at 0.8; the card and tool results say so. When the clip ends before the last copy would start, the card names how many copies it can show. Instances and Time offset cannot be keyframed: they set the window of frames the effect keeps ready.
- Normal. Sequence Blend draws the current frame first and each older copy over it, so modes that cover what lies below bury the current frame: in Normal at Decay 0.8 with 20 instances it keeps under 1 % of the result (at Decay 1 none). The card says so when Normal is chosen with Decay below 1.
- Blend modes. All 37 timeline blend modes, grouped by family, with the timeline’s own colour formulas. Opacity multiplies each copy’s alpha; the first copy seeds the stack and the others composite in straight alpha. Stencil and Silhouette mask the alpha gathered so far; Dissolve uses the pixel position and Dancing Dissolve also the timeline time. Changing the mode keeps the frame cache and the compiled shader.
- Source. The copies come from the original video’s own timestamps, including trims, speed changes and reverse clips, and do not depend on earlier playback. The current copy uses the effect’s input. Time Stack needs a video clip, not a still image or a nested composition.
- Memory and playback. The frame cache reserves only the estimated window plus a lookahead, within the device limits. When the whole source interval fits it is preloaded; otherwise the free slots are spread over the delayed copies. The first playback or a distant seek can wait for frames: the preview holds the last complete picture meanwhile, and the export waits for the exact frames and reports resource failures. No real-time rate is guaranteed when the window does not fit.
- The graph. Fifteen nodes make the whole stack. Sequence Blend works with other image sequences too. The effect supplies the window of i × Time offset delays itself, so a graph edit that changes the delays does not widen it: use the Time offset control for that.
- Saved projects. A Time Stack stored without Decay (a project or effect preset from before Decay existed) renders with Decay 1, as it always looked, and saving writes that 1; its blend mode stays. Untouched saved graphs gain the Decay nodes; graphs edited before Decay existed stay as saved, the card notes that Decay has no effect there, and a preset sets only Instances, Time offset and Blend mode on them. The presets are not stored in projects, so saved Time Stacks keep their look.
- More: Temporal frame access · Effect system · Node Catalog · Styles and presets.